Today I was updating my PowerShell modules on my local system but I ran into an issue related to certificates. After some investigation, it appeared that the PowerCLI Update was failing. Every PowerCLI module that it tried to update returned an error and did not update to a newer version. In this blog post, I am showing you how to get rid of this error and you will be able to update PowerCLI again to the latest version.
Environment
Here is a quick summary of my environment where the issue occurred:
Current PowerCLI: 12.1.0.16997004
The system tried to update PowerCLI to: 12.4.0.18627054
Operating System: Windows 10 Pro (21H1)
Problem
Here is an overview of the PowerShell command I used to update my modules. Also, the error message is listed below in the code box. As you can see PowerShell is complaining about a DigiCert certificate and that it is not save to update because of the certificate change.
# Open a PowerShell command prompt with administrative permissions

# Enter the command to update the PowerShell modules
Update-Module

# The following error message appears
Install-Package: Authenticode issuer 'CN=DigiCert Trusted Root G4, OU=www.digicert.com, O=DigiCert INc, C=US' of the new module
'VMware.VimAutomation.Sdk' with version '12.4.0.18627054' is not matching with the authenticode issuer 'CN=VeriSign Class 3 Public Primary Certification
Authority - G5, OU="(c) 2006 VeriSign, Inc. - for authorized use only", OU=VeriSign Trust Network, O="VeriSign, Inc.", C=US' of the previously-installed
 module 'VMware.VimAutomation.Sdk' with version '12.1.0.16997004'.
Here is a screenshot of the error message, error message is listed in red text. It also shows the commands I used for the PowerCLI update on my local system.
PowerCLI – Update – Certificate Issue
Solution
The solution for fixing the issue is quite simple. Just reinstall the VMware PowerCLI modules on your local system. This needs to be done in a forced way but after that, you are done.
# Open a PowerShell command prompt with administrative permissions

# Enter the command to re-install the PowerShell modules
Install-Module VMware.PowerCLI -Force -SkipPublisherCheck

# Wait a couple of minutes and everything should be upgraded.
Get-Module -ListAvailable VMware.PowerCLI | Select-Object Name, Version
As you can see in the screenshots below the PowerCLI update is working and is returning no errors after the upgrade.
PowerCLI – Force a new install
PowerCLI – Update Working
PowerCLI – Updates working without problem
Wrap-up
This wraps up this small blog post about a PowerCLI update issue in PowerShell. Thank you for reading and I hope it helped you out. Please respond in the comment section below if you have any questions or remarks!
Today a basic tutorial on vRealize Orchestrator 8.X drop-down boxes in a form. With a basic drop-down box, you can improve the user experience in selecting and requesting items from your cloud management portal (CMP). By using drop-down boxes you can leverage easy validation and responses based on other drop-down boxes in your form.
In this tutorial, we are going to create dropdown boxes that respond to each other based on the user’s selection. This can be handy for improving the user experience. Sometimes the list can become very big with numerous options. By sub-selecting a group and filtering to a smaller list of options the user can easier make his decision.
Keep in mind:
This tutorial is focused on vRealize Orchestrator 8.X but can still be leveraged in vRealize Orchestrator 7.X with some minor modifications.
This tutorial is also usable for vRealize Automation 8.X forms. This can be leveraged by the Service Broker component by importing vRealize Orchestrator workflows.
Use Case
To give you some background around the code and usability. Let’s assume we are developing a workflow for creating Virtual Machines in vSphere. Based on user input surrounding the Operating System information we can determine the type of virtual machine that will be created when the request is submitted. We can also limit the user to some standard options like only Windows 10 or Windows Server 2019.
Keep in mind: this blog post is only focused on the form part, not on the actual creation of the virtual machine in vSphere.
vRO Actions
The first action we are going to create is called “formVmOsFamily“. This will display three values in the form. Based on what you select here the second action will be triggered.
/*
Script name: formVmOsFamily

Inputs:
- None

Return Type:
- vRO 8.X: string:array

Description field:
Author: M. Buijs - ITQ
Developed by: M. Buijs - ITQ
Date: 2021-08-17
Version: 1.0.0

Description: This action returns the available Guest Family of the Operating Systems.
*/


// Operating System Family list
return [
    "Linux",
    "VMware",
    "Windows"
];
Here is the second action that is called “formVmOsGuest“. This will respond to the input provided by the operating system family in the interface.
/*
Script name: formVmOsGuest

Inputs:
- osFamily (string) = Operating System Family

Return Type:
- vRO 8.X: string:array

Description field:
Author: M. Buijs - ITQ
Developed by: M. Buijs - ITQ
Date: 2021-08-05
Version: 1.0.0

Description: This action returns the available Guest Operating Systems.
*/

// Input validation
if (osFamily == "" || osFamily == null) {
    return ["Please select the Operating System family first"];
}

// Linux
if (osFamily == "Linux")
return [
    "CentOS 6 (64-Bit)",
    "CentOS 7 (64-Bit)",
    "CentOS 8 (64-Bit)",
    "Debian 10 (64-Bit)"
];

// VMware
if (osFamily == "VMware")
return [
    "VMware ESXi 6.0",
    "VMware ESXi 6.5",
    "VMware ESXi 6.7",
    "VMware ESXi 7.0"
];

// Windows
if (osFamily == "Windows")
return [
    "Windows 10 (64-Bit)",
    "Windows Server 2016 (64-Bit)",
    "Windows Server 2019 (64-Bit)",
    "Windows Server 2022 (64-Bit)"
];
Here is an overview of screenshots of how it should look like when created the actions in vRealize Orchestrator:
Here is the vRealize Orchestrator workflow, I have created an empty workflow and only configured the input form dropdown part! This will help you to set up the workflow so that the actions will work in your environment. The important part is not to forget to configure the workflow inputs and listed below:
Inputs:
virtualMachineOsFamily (string)
virtualMachineOsGuest (string)
vRealize Orchestrator – Dropdown – Workflow 01
vRealize Orchestrator – Dropdown – Workflow 02
vRealize Orchestrator – Dropdown – Workflow 03
vRealize Orchestrator – Dropdown – Workflow 04
vRealize Orchestrator – Dropdown – Workflow 05
vRealize Orchestrator – Dropdown – Workflow 06
vRealize Orchestrator – Dropdown – Workflow 07
vRealize Orchestrator – Dropdown – Workflow 08
vRealize Orchestrator – Dropdown – Workflow 09
vRealize Orchestrator – Dropdown – Workflow 10
vRealize Orchestrator – Dropdown – Workflow 11
vRealize Orchestrator – Dropdown – Workflow 12
vRealize Orchestrator – Dropdown – Workflow 13
Recording
Here is a recorded video of the input form dropdown boxes in action. The video demonstrates the capability of dropdown boxes and what they can deliver for a customer. It also gives you an idea of what you will get after creating the workflow and actions.
Improvements/Guidance
If you are going to use this code in production… You might need to consider some important points:
Always create a list of supported Operating Systems that are used and allowed to be used in your Company. More options will not always simplify the deployment for an end-user.
You could store the values in a vRealize Orchestrator Configuration Element depending on how frequently this list is changed.
Summary
So this concludes my blog post about creating dropdown boxes in vRealize Orchestrator and reacting on the input. Hopefully, this was useful for somebody getting started with interfaces in vRealize Automation (vRA) or vRealize Orchestrator (vRO). Please respond in the comment section below if you have any questions or remarks!
This blog post is about upgrading vRealize Orchestrator 8.X to a newer version. After a couple of vRealize Orchestrator Upgrades since the 8.0 release and getting stuck a couple of times I decided to do a simple write-up with some tips and tricks.
In my lab environment, I have got multiple orchestrators running embedded, standalone, and cluster. Most issues I encountered are related to the standalone version that is connected with the VMware vCenter Server.
vRO upgrade checks
Let’s start with some simple upgrade checks to make sure everything is working before the upgrade and to improve the chance of succeeding.
Make sure the root account is not expired on all nodes in the cluster.
Make sure you have the correct vCenter SSO password. Verify this by logging in with administrator@vsphere.local on the vCenter Server. The password is required for the standalone upgrade that is directly connected to the VMware vCenter Server.
Make sure the time sync is working on all the nodes in the cluster.
vRO upgrade
Let’s start with the vRealize Orchestrator Upgrade. Here is an overview of the procedure and the commands required to perform the upgrade.
Keep in mind: Step six is optional and is only required for the vRealize Orchestrator that is connected to the vCenter SSO. For the vRealize Automation connected upgrade, this step can be skipped.
Procedure:
Create a virtual machine snapshot.
Open an SSH session with the vRealize Orchestrator node.
Login with the root account on the vRealize Orchestrator node.
Mount the upgrade media to the virtual machine.
Mount the media in the linux system (mount /dev/sr0 /mnt/cdrom).
Enter the SSO password as a variable in the shell (export VRO_SSO_PASSWORD=your_sso_password).
The upgrade will start. Depending on the size of the vRealize Orchestrator node it will take between 30 to 90 minutes.
After the upgrade is completed restart the system (reboot).
Verification:
Check the virtual machine console for startup issues. Make sure the console is displaying a blue screen with information about the node.
Check the virtual machine console for the version/build number on the blue screen that it is displaying.
Check if the web interface is available and the interface is working.
Login into the vRO interface and verify that authentication is working.
Run a basic workflow.
Remove the virtual machine snapshot.
Screenshot(s)
Here are a couple of screenshots of the upgrade process and the end result after a successful upgrade:
vRealize Orchestrator 8.X – Upgrade – Part 1
vRealize Orchestrator 8.X – Upgrade – Part 2
vRealize Orchestrator 8.X – Console
Summary
So that was my short blog post about the vRealize Orchestrator Upgrade experience so far for version 8.X. I hope it was useful. In most cases, there were problems with an expired account or an incorrect SSO password.
It would be nice if the upgrade process would validate the entered SSO password instead of hanging for hours in a crashed upgrade state without returning any error message to the console or shell session.
Thanks for reading and see you next time! Please respond in the comment section below if you got any remarks :).
Today we are going to work on an HPE ProLiant DL20 Gen9 server. After the initial installation, I was using an SD card as boot media but I still had some Delock SATADOMs laying around from my older lab servers that were replaced. So it was time to improve the performance of the boot media in the servers. In this blog post, I am explaining in detail the SATADOM installation in an HPE ProLiant DL20 Gen9.
So what are the advantages compared to an SD card:
VMware ESXi boot time about 50% faster
VMware ESXi upgrade time about 70% faster
Inventory performance (very noticeable when clicking through the VMware vCenter or VMware ESXi web GUI)
The overall stability of the host, this because of the “high” failure rate of the SD card.
The summary of advantages is based on my own comparison between SD cards en SATADOMs in my ESXi Hosts in my Home Lab.
Delock SATADOM Specifications
Here are the specifications of the Delock Satadom devices I am using for both HPE ProLiant DL20 Gen9 servers. Here are some tips about what I have learned so far… I bought them in 2018 so they are not brand new anymore:
Buy them a little bit bigger because of the future proof > minimal 32GB I would suggest.
Verify before buying if you need the vertical or horizontal model (rack model server go for horizontal / tower model server no really important).
So now it is time to install the device on the server. Of course, it is a little more complicated in a small half-size rack server. For example, there are no Molex power connections available by default. So in the end the cable kit is almost more expensive than the device itself. The preferred option should be to find an HPE cable kit, not sure which one you will need. So after some thinking and looking into the server I came up with the following solution to just plugin the SATADOM.
At first, I needed to find a SATA port on the motherboard. Both ports are available in my case but I used the one that is normally used for the DVD ROM drive number 14 (see the image from the HPE manual).
The storage device itself can be placed in the space of the storage controller battery pack. Both of my machines do not have the expensive storage controller option. Only the onboard default controller. So the space is completely empty and an easily accessible location for the SATADOM.
The power is the most difficult one. I ended up with converters to into the power connection from the storage backplane (keep in mind my server has no internal storage except the boot device (the SATADOM in this post…) If you have your storage filled with SSDs or HDDs you need to figure out a new solution where to get the power from. I have read something about a power kit for the DVD ROM for example. I have never seen it on a picture or in a server so I do not know which connectors are in that cable kit but it might be an option.
To make some more sense and pictures explain more than words… Here is a gallery with some pictures of the SATADOM installation:
HPE ProLiant DL20 Gen9 – Motherboard SATA port
HPE ProLiant DL20 Gen9 – Satadom installation – sata port
HPE ProLiant DL20 Gen9 – Satadom installation – power
DL20 Gen 9 BIOS Settings
After the physical installation, it was time to set up the BIOS. To be honest it was quite easy compared to the HPE Gen8 where I had a lot of problems because of the ports and bios settings.
Here are two screenshots. The first one is the activation of the internal storage controller. Note: make sure you power cycle the machine before the SATADOM is detected. After the power cycle, the VMware ESXi installer should detect the SATADOM when trying to install VMware ESXi.
After this point, the SATADOM installation is completed. Just continue your normal procedures and put your host into production when you are done.
So that is it for today…! I hope it was useful for other people and interesting to read. Keep in mind this blog post was focused on the HPE ProLiant DL20 Gen9 but I think the procedure will be quite identical to other HPE Gen9 servers. The most difficult part will always be the cabling and after that, the BIOS settings to get the device detected correctly.
So far my hosts have been running for about 40+ days without any issues and are working perfectly fine. If you got additional questions or remarks please respond in the comment section below. Thanks for reading my blog post and see you next time.
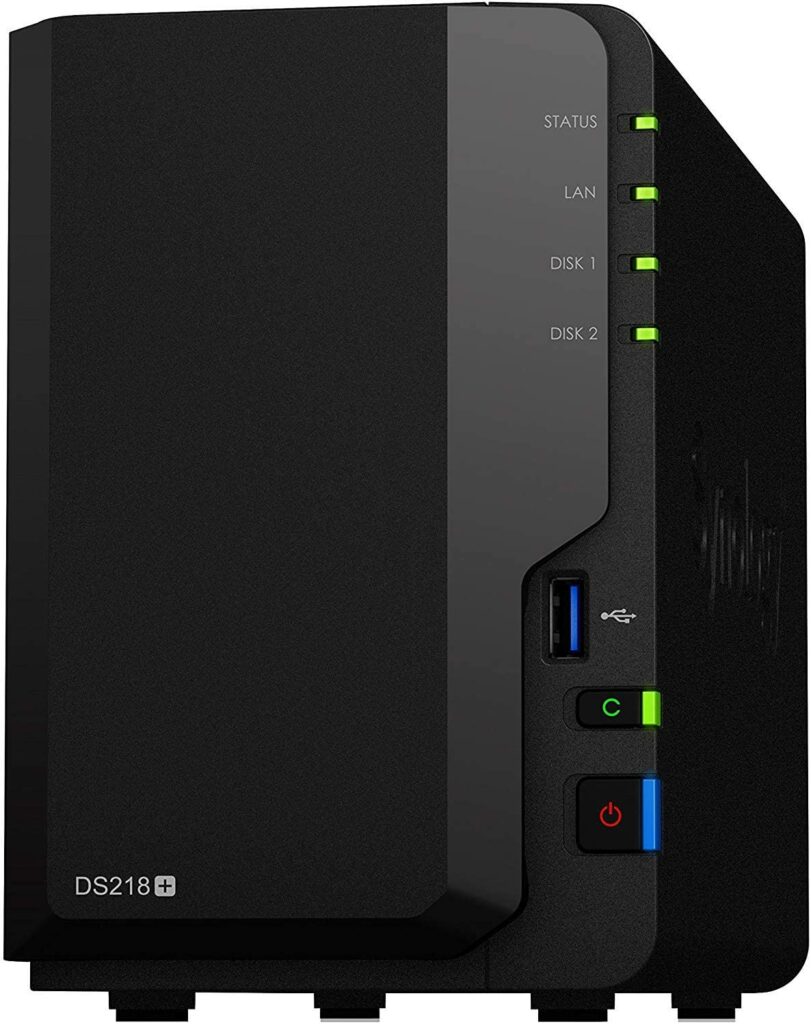
In the blog post, we are going to work on a Synology DS218+ Memory Upgrade. By default, there is 2GB of memory installed but you are able to upgrade the memory to more!
So why do I need more memory? I am currently using the Synology package called Cloud Sync to back up my data to Amazon AWS S3. Based on my monitoring information about the Synology DS218+ it is having issues with its amount of memory installed by default. Sometimes the device becomes completely unreachable for a couple of seconds/minutes because of the load that is generated by the backup that is running and that is of course less than ideal.
So it was time to figure out what was possible with the Synology DS218+, I have created a simple overview based on the information from the vendor his website and added some community feedback:
Note: Yes I have read about people that are actually running with more memory than 8GB. In my opinion, you need a use case for that and that is not something I have for this device.
Memory module
So there are multiple ways to deal with the Synology DS218+ memory upgrade:
Option 01: Just add a 4 GB module to memory slot 2 > Results in 6GB running on two different vendors
Option 02: Remove the 2GB module and only install the 4GB module > Results in 4GB running with one single module
Option 03: Removing the original module in slot 1 and installing in slot 1 and slot 2 a new module > Results in 8GB running on one vendor.
Another option is to install original modules from Synology, but those modules are in the country where I live in about 80% more expensive. So based on that information I was not an economical option in my opinion for just adding 4GB of memory in 2021 :|. Keep in mind the road I took is officially not supported by Synology also the memory module triggers are warning after every startup of the device that the memory that is installed is not verified/supported.
I ended up with option 01 and if that would not work I would go for option 02. So I bought the following memory module on Amazon, based on the Kingston memory configurator page to identify the correct memory for your device:
Vendor: Kingston
Type: HyperX Impact 1866 MHz 4GB
Artikel number: HX318LS11IB/4
Costs including shipping: € 27,50
Kingston HyperX Impact HX318LS11IB/4
Installation & Result
After the memory module was delivered it was time to start the installation. To put it into perspective it is really a walk in the park. You do not need any screwdrivers are other components if you are installing or removing a module in slot number 2!
Side note: If you want to remove the memory module in slot 1 that is a whole other story… there is some information floating around on the internet but that is the other side of the spectrum. It means completely removing the motherboard etc. Here is a great YouTube video on that.
Memory installation – procedure:
Power off the device.
Remove the connected cables like UTP and power.
Put the Synology on your desk.
Remove the hard drive that is nearest to the front panel LEDs and power button.
Look into the device and you will see an empty memory slot.
Place your newly bought memory module into the slot.
Put back the removed hard drive.
Connect the cables back up.
Power on the device.
The boot will take additional time because of a memory validation that is running (took about 15 minutes extra).
The device will finally be available and verify the DSM information page.
Synology DS218+ – Memory Installation
Synology DS218+ – DSM Memory
Wrap-up
So that was my blog post about the Synology DS218+ memory upgrade. I have been running the current setup since October 2020 and I can tell you it is completely stable. You can see the uptime in the Synology DSM screenshot 82 days and counting.
If you got additional questions or remarks please respond in the comment section below. Thanks for reading my blog post and see you next time.
This blog post is about replacing my current 24×7 Lab with a new set of two HPE ProLiant DL20 Gen9 servers. In this blog post, I am going to tell you about the configuration of the machines and how they are running on VMware ESXi. Also, I am going to compare them to my other lab hardware and my past home lab equipment.
Hardware
So let’s kick off with the hardware! The HPE DL20 Gen 9 servers I bought were both new in the box from eBay and I changed the hardware components to my own liking.
A couple of interesting points I learned so far nearly all servers that you will find for sale are provided with an Intel Xeon E3-12XX v5 processor. One item you need to take into account: yes you can swap the CPU from a v5 to a v6 like I did but you need to replace the memory modules also! The memory modules are compatible with a v5 or v6 processor but not both ways. The Intel Xeon E3-12XX v5 CPUs are using 2133 MHz memory and the Intel Xeon E3-12XX v6 CPUs are using 2400 MHz memory. So keep that in mind when swapping the processor and/or buying memory.
In the end, after some swapping of components, I ended up with the following configuration. Both ProLiant servers have an equal configuration (like it should be in a vSphere cluster):
So far I have measured the power usage of the machines individually with the listed configuration in the hardware section. When measuring the power usage the machine was running VMware ESXi and on top of about seven virtual machines that were using about 30% of the total compacity. I was quite amazed by the low power consumption of 31.7 watts per host but I have to take into account that this is only the compute part! The hosts are not responsible for storage. Here is a photo of my power meter when performing the test:
HPE ProLiant DL20 Gen9 – Power Usage
Screenshot(s)
Here are some screenshot(s) of the servers running in my home lab environment and running some virtual machine workload:
Screenshot 01: Is displaying one of the hosts running VMware ESXi 6.7 (screenshot from HPE iLO).
Screenshot 02: Is displaying one of the hosts connected to VMware vCenter and running virtual machines.
Screenshot 03: Is displaying one of the hosts HPE iLO web page.
HPE ProLiant DL20 Gen9 – VMware ESXi 6.7
HPE ProLiant DL20 Gen9 – Running in VMware vCenter
HPE ProLiant DL20 Gen9 – Integrated Lights Out
Positives & Negatives
To sum up, my experience I have created a list of positives and negatives to give you some insight into the HPE ProLiant DL20 Gen9 as a home lab server.
Rack-mounted servers (half-size deep with sliding rails).
Out of band management by default (HPE iLO).
Power usage is good for the amount of compute power delivered.
No additional drivers are required for VMware ESXi to run.
The HPE DL20 Gen9 has been on the VMware HCL, link.
Negatives:
Noisy compared to my previous setup (HPE ProLiant ML10 Gen8). For comparison, the HPE ProLiant DL360 Gen8 is in most cases “quiet” compared to the HPE ProLiant DL20 Gen9.
Would be nice if there was support for more memory because you can never have enough of that in a virtualization environment ;).
Photos
Here are some photos of the physical hardware and the internals, I did not take any pictures of the hardware when the components were all installed. I am sorry :(.
Screenshot 01 – Is displaying both machines running and installed in the 19″ server rack.
Screenshot 02 – Is displaying the internals of the DL20 Gen9. Keep in mind this one is empty. As you can see in that picture the chassis is just half-size!
HPE ProLiant DL20 Gen9 – Inside rack
HPE ProLiant DL20 Gen9 – Empty chassis
Wrap-up
So that concludes my blog post. If you got additional questions or remarks please respond in the comment section below. Thanks for reading my blog post and see you next time.
In this last blog of the year, we are going to set up the SNMP agent on VMware vCenter Server. This blog will cover the vCenter SNMP configuration and I will show some debugging examples to verify the working of the SNMP Agent. In my case, I am using Zabbix Server as the monitoring program to verify the status of my VMware vCenter Server in my lab environments. This reduces the amount of manual troubleshooting and ensures that services are running as expected.
The reason why I did this write-up was because of the lack of documentation from the vendor’s website. As you can see in the source pages below there is a limited set of commands and nearly no examples. To set up my environment I needed some additional commands to get everything working correctly.
Environment
The environment where I configured the SNMP agent was on a VMware vCenter Server 6.7 update 3 (VCSA /appliance). I am monitoring the VMware vCenter Server with a Zabbix Server that is running on CentOS 8. I am currently using SNMP v2 in this example because it is used by most people.
Keep in mind: SNMP v1 and v3 are also supported by both products. My recommendation is to use SNMP v3 of course because of the security improvements like authentication & encryption :).
SNMP
A quick explanation about SNMP (thanks Wikipedia): Simple Network Management Protocol (SNMP) is an Internet Standard protocol for collecting and organizing information about managed devices on IP networks and for modifying that information to change device behavior. Devices that typically support SNMP include cable modems, routers, switches, servers, workstations, printers, and more.
SNMP is widely used in network management for network monitoring. SNMP exposes management data in the form of variables on the managed systems organized in a management information base (MIB) which describes the system status and configuration. These variables can then be remotely queried (and, in some circumstances, manipulated) by managing applications.
Commands
Here are the commands I have used for the vCenter SNMP configuration. Note: make sure you have access to the root account to perform the login.
# Step 1: Start an SSH connection with the vCenter Server (use Putty or something equivalent).

# Step 2: Login as the root user

# Step 3: After a successful login you should be in the appliance Shell.

# Step 4: View the current configuration for SNMP
snmp.get

# Step 5: Configure the SNMP Community (in this example I use MySnmpCommunity)
snmp.set --communities MySnmpCommunity

# Step 6: Allow a device to access the SNMP agent (192.168.10.10 = monitoring server)
snmp.set --targets 192.168.10.10@161/MySnmpCommunity,172.0.0.1@161/MySnmpCommunity,localhost@161/MySnmpCommunity

# Step 7: Enable the SNMP Agent
snmp.enable

# Step 7: Verify the SNMP Settings configured
snmp.get

# Step 8: Test the working (in my case it never works... not sure why? Has something to do with my access restrictions?)
snmp.test

# Step 9: Perform a test from the monitoring server (in my case a Linux machine with snmpwalk)
snmpwalk -v2c -c MySnmpCommunity %hostname-vcenter%
Screenshots
Here are some screenshots related to the SNMP configuration:
VMware vCenter SNMP Configuration – Configuration
VMware vCenter SNMP Configuration – Version running
VMware vCenter SNMP Configuration – Test issue
Wrap-up
So that is it! Hopefully, this blog post was useful and this wraps-up 2020. See you next year and if you have any comments please respond below.
Sources
Here are some sources I used when configuring SNMP on VMware vCenter Server:
In this blog post, I am showing a simple vRealize Orchestrator action that receives information about vRealize Orchestrator nodes. This can also be used against remote nodes to compare orchestrator versions between different nodes. It displays the product version, product build, and API version.
So why do you want to verify that? Lately, a hot topic surrounding the vRealize Orchestrator software is migrations. This is because most customers are moving away from version 7 to version 8 (here you see vRO 8.X in action). So as a VMware consultant, you run into questions from customers about compatibility and integration use cases.
Below I will share the code and a video about using the action. You mean workflow right? No since vRO 8.0 you can run the action directly you do not need a workflow around it.
Code explained
Some explanation about the action called “troubleshootVroVersion“:
The action requires one input parameter that is called ‘fqdn’. Here you enter for example (vro.domain.local). This action detects which URL and port are required so it automatically supports the following scenarios:
This can be a standalone node, an embedded node (inside vRA), the central load balancer in front of the nodes.
There is support for the vRealize Orchestrator 7.X version and vRealize Orchestrator 8.X version.
No authentication is required because the leveraged API page is publically available without authentication.
The only port required between the Orchestrator that is executing the action and the remote Orchestrator is HTTPS TCP 443.
vRO Configuration
Here is an image of the configured vRO Action. You can see the input and return type configured. Also, you see the configured language that is used “JavaScript“.
vRealize Orchestrator Identifying Version Running
Video
I have created a recording of a vRealize Orchestrator node running the action against itself. This can also be done against a remote vRealize Orchestrator node as explained before. This might also help somebody to create the action on his own orchestrator.
Code
Here is the code for the action and also the action configuration details for creating the action in vRealize Orchestrator:
// Input validation
if (!fqdn) {
    throw "The input variable 'fqdn' is null, this is not allowed!";
}

// Determine vRO Port
try {
    // Port 8181
    url = "https://" + fqdn + ":8181/vco/api/about";

    // Create URL object
    var urlObject = new URL(url);

    // Retrieve content
    var result = urlObject.getContent() ;

    // Message
    System.log ("Found a vRealize Orchestrator node on port 8181");
}
catch (error) {
    System.log ("No vRealize Orchestrator node found on port 8181 (" + error.message + ")");
}
try {
    // Port 443
    url = "https://" + fqdn + ":443/vco/api/about";

    // Create URL object
    var urlObject = new URL(url);

    // Retrieve content
    var result = urlObject.getContent() ;

    // Message
    System.log ("Found a vRealize Orchestrator node on port 443");
}
catch(error) {
    throw "Could not find any vRealize Orchestrator node on port 443 & 8181 (" + error.message + ")";
}

// JSON Parse
try {
    // Parse JSON data
    var jsonObject = JSON.parse(result);
}
catch (error) {
    throw "There is an issue with the JSON object (" + error.message + ")";
}

// Output data to screen
try {
    System.log("===== " + fqdn + " =====");
    System.log("Version: "+ jsonObject.version);
    System.log("Build number: "+ jsonObject["build-number"]);
    System.log("Build date: "+ jsonObject["build-date"]);
    System.log("API Version: "+ jsonObject["api-version"]);
}
catch (error) {
    throw "There is something wrong with the output, please verify the JSON input (" + error.message + ")";
}
GIT
Here is the Git Repository related to the code as shown above. The action used in the blog post is called “troubleshootVroVersion.js” inside the Git repository that is available on this URL.
Wrap Up
So that is it for today. In this blog post, I showed you an action to retrieve quickly some information about the Orchestrator version. As you can see in the code it is using a JSON object that is retrieved from a URL. This code is because that part easily usable for other items. So happy coding in vRO and see you next time!
When running VMware vRealize Orchestrator 8.X at some point in time you need to install a hotfix. When performing this operation at a customer I was running into an issue, I could not find the link on the VMware website in the first place.
After some searching, I found the location so I thought lets write a small blog post about locating the patch files on the VMware website.
Keep in mind: this blog post is focused on a standalone vRealize Orchestrator instance that requires a hotfix bundle. This is not for the embedded version inside vRealize Automation (vRA).
Download location
At first, we need to go to the appropriate location on the VMware website. This update and the latest patched installation files are in my opinion not easy to find. Because you would expect the files to be on the VMware Download page. So where do we need to go?!
Select the vRealize Orchestrator product and the appropriate version.
On this page, you will found OVA versions and iso version of the latest vRO hotfixes.
My VMware – vRealize Orchestrator Hot Fixes
Note:
*.OVA = is required for installing a new vRealize Orchestrator instance.
*.ISO = is required for patching a currently running vRealize Orchestrator instance.
vRealize Orchestrator Install Hotfix
Here is a short description of how to install a vRealize Orchestrator 8.X hotfix. Keep in mind when writing this blog post vRealize Orchestrator 8.2 did not have a hotfix yet! So far I figured out a difference between the releases:
In the latest release of VyOS, a new feature has been added to the product called VRF. VRF or Virtual Routing and Forwarding is a technology that makes it possible to create multiple routing tables on a single router. In this blog post, we are going to set up a VyOS management VRF for out-of-band management traffic.
VRF is for a lot of people in network land a known technology and is leveraged in companies all over the world. The only limit was that VyOS was not capable of running a VRF before. So after the release of the VRF feature is was time to figure out if it working as I would expect it.
So what is a VRF?
I already talked a little bit about Virtual Routing and Forwarding but here is the official statement from the Wikipedia website:
“Virtual routing and forwarding (VRF) is a technology that allows multiple instances of a routing table to co-exist within the same router at the same time. One or more logical or physical interfaces may have a VRF and these VRFs do not share routes therefore the packets are only forwarded between interfaces on the same VRF. VRFs are the TCP/IP layer 3 equivalent of a VLAN. Because the routing instances are independent, the same or overlapping IP addresses can be used without conflicting with each other. Network functionality is improved because network paths can be segmented without requiring multiple routers.”
Goal
The goal for me was to create an out-of-band management interface on my virtual VyoS router that is running on VMware vSphere. This can only be achieved by the new VRF feature because you get an extra/new routing table that is used by the VRF only. The main reason for me was to split the SSH and SNMP traffic from the rest of the traffic. One of the perks of having a dedicated interface is to improve security and it makes creating firewall rules easier because all of the out-of-band interfaces are in one dedicated network.
Here is an overview of the vSphere VM running VyOS with two virtual network cards connected. As you can see one NIC is connected to a portgroup that allows multiple VLANs and the other is connected to a dedicated network for out-of-band management.
VyOS – VMware Virtual Machine – Configuration
VRF Configuration
Now it is time to start configuring VyOS to leverage the VRF. Below you will find the IP addresses that I have used as an example in this blog post.
The first step is setting up an interface that will be leveraged by the VRF in the next part of the configuration.
### Create a new interface
set interfaces ethernet eth1 address 192.168.200.1/24

### Set interface description (optional)
set interfaces ethernet eth1 description 'Dedicated Out-of-Band Management Interface'
Now it is time to set up the VRF configuration and link it to the newly created interface. After that point, the VyOS Management VRF should be reachable in the network.
### Create a VRF called OOB-Management with a new routing table
set vrf name OOB-Management table 100

### Add a description
set vrf name OOB-Management description Out-Of-Band_Management

### Assign the physical interface to the VRF
set interfaces ethernet eth1 vrf OOB-Management

### Add a static route for the VRF to get access to a gateway
set protocols vrf OOB-Management static route 0.0.0.0/0 next-hop 192.168.200.254
Here are some troubleshooting commands that I used when configuring the VRF on VyOS.
### Routing table VRF
show ip route vrf OOB-Management

### Ping
ping 192.168.200.254 vrf OOB-Management
Now it is up and running it is time to set up the out-of-band management services. In my case, this will be SSH & SNMP. SSH is used for access to the command-line of the VyOS router and SNMP is used for monitoring.
### SSH - Activate the service on the VRF
set service ssh vrf OOB-Management

### SSH - Active listing address for SSH on Out-of-Band network
set service ssh listen-address 192.168.200.1

### SNMP - Active the service on the VRF
set service snmp vrf OOB-Management

### SNMP - Add permissions
set service snmp community routers authorization ro
set service snmp community Public
set service snmp community routers client 192.168.200.20

### SNMP - Set the location and contact
set service snmp location "Be-Virtual.net - Datacenter"
set service snmp contact "admin@be-virtual.net"

### SNMP - Activate the listening address
set service snmp listen-address 192.168.200.1 port 161
Here is some information about my IP numbers:
VyOS IP Address for Out-of-Band Management = 192.168.200.1
Gateway of the Out-of-Band Management network = 192.168.200.254
Monitoring server that monitors with SNMP = 192.168.200.100
Wrap-up
The VRF feature that is added to VyOS is really great! It is a great addition to an already great product. There are a lot of use cases think about multiple routers with different routing protocols running on a single VyOS box with there own routing table.
For me, this was an easy step to test the VRF feature with the Out-of-Band management test. This is just the first of testing the VRF. The next step will be to connect with my lab environment and leveraging BGP. Currently, I am running multiple boxes for multi-site just to test VMware NSX-T in my Lab environment. This can be simplified with VRFs!
Thanks for reading this blog post and see you next time. If you have any comments? Please respond below! 🙂
Sources
Here are some sources I used for setting up the management VRF: