In this last blog of the year, we are going to set up the SNMP agent on VMware vCenter Server. This blog will cover the vCenter SNMP configuration and I will show some debugging examples to verify the working of the SNMP Agent. In my case, I am using Zabbix Server as the monitoring program to verify the status of my VMware vCenter Server in my lab environments. This reduces the amount of manual troubleshooting and ensures that services are running as expected.
The reason why I did this write-up was because of the lack of documentation from the vendor’s website. As you can see in the source pages below there is a limited set of commands and nearly no examples. To set up my environment I needed some additional commands to get everything working correctly.
Environment
The environment where I configured the SNMP agent was on a VMware vCenter Server 6.7 update 3 (VCSA /appliance). I am monitoring the VMware vCenter Server with a Zabbix Server that is running on CentOS 8. I am currently using SNMP v2 in this example because it is used by most people.
Keep in mind: SNMP v1 and v3 are also supported by both products. My recommendation is to use SNMP v3 of course because of the security improvements like authentication & encryption :).
SNMP
A quick explanation about SNMP (thanks Wikipedia): Simple Network Management Protocol (SNMP) is an Internet Standard protocol for collecting and organizing information about managed devices on IP networks and for modifying that information to change device behavior. Devices that typically support SNMP include cable modems, routers, switches, servers, workstations, printers, and more.
SNMP is widely used in network management for network monitoring. SNMP exposes management data in the form of variables on the managed systems organized in a management information base (MIB) which describes the system status and configuration. These variables can then be remotely queried (and, in some circumstances, manipulated) by managing applications.
Commands
Here are the commands I have used for the vCenter SNMP configuration. Note: make sure you have access to the root account to perform the login.
# Step 1: Start an SSH connection with the vCenter Server (use Putty or something equivalent).

# Step 2: Login as the root user

# Step 3: After a successful login you should be in the appliance Shell.

# Step 4: View the current configuration for SNMP
snmp.get

# Step 5: Configure the SNMP Community (in this example I use MySnmpCommunity)
snmp.set --communities MySnmpCommunity

# Step 6: Allow a device to access the SNMP agent (192.168.10.10 = monitoring server)
snmp.set --targets 192.168.10.10@161/MySnmpCommunity,172.0.0.1@161/MySnmpCommunity,localhost@161/MySnmpCommunity

# Step 7: Enable the SNMP Agent
snmp.enable

# Step 7: Verify the SNMP Settings configured
snmp.get

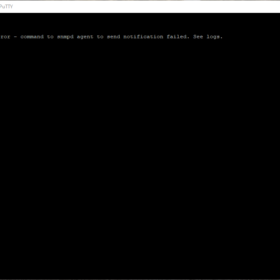
# Step 8: Test the working (in my case it never works... not sure why? Has something to do with my access restrictions?)
snmp.test

# Step 9: Perform a test from the monitoring server (in my case a Linux machine with snmpwalk)
snmpwalk -v2c -c MySnmpCommunity %hostname-vcenter%
Screenshots
Here are some screenshots related to the SNMP configuration:
Wrap-up
So that is it! Hopefully, this blog post was useful and this wraps-up 2020. See you next year and if you have any comments please respond below.
Sources
Here are some sources I used when configuring SNMP on VMware vCenter Server:
- VMware Docs: Configure the SNMP Agent to Send v1 or v2c Notifications
- VMware Docs: Configure SNMP Communities


Thanks much appreciated! Helped a lot for setting up SNMP for our monitoring environment :).
Glad to be of help!
Your instructions are more complete than others I have seen. My Observium server can now see my vCenter server! Thanks!!
Thank you this really helped me out.. It would be helpful to show the contact info settings as well.