Tag: vSphere

VMware Tanzu HAProxy Unattended Deployment

In this blog post, I am going to share my script to automate the HAProxy deployment for Tanzu with vSphere or in short TKGs. Because of my interest in the Tanzu product family, I ended up testing and redeploying parts of TKG many times. To reduce the change of mistakes and improve my speed I automated the HAProxy deployment part. To start with a special thanks to William Lam for this blog post which pointed me in the right direction for automating the HAProxy OVA file.

Goal

The reason behind the creation of the code was the following:

  • Automate as much as possible
  • Standardize deployment
  • Streamline the process
  • Improved the speed of the deployment process

Environment

My environment for performing this unattended deployment of HAProxy is listed below. All additional requirements can be found in the README.md file in the GIT Repository like DNS records etc.

  • Server:
    • VMware ESXi 7.0 Update 3
    • VMware vCenter 7.0 Update 3
  • Workstation:
    • OS: Windows 10
    • Components required: PowerShell and PowerCLI

Recording

Here is a recording of the HAProxy unattended deployment in my lab environment. I have changed the variables in the script to match my environment. You must change the variables in a way so that it matches your environment to perform a successful deployment.

Code

Here is an overview of the code and a link to the GIT repository. Keep in mind to always use the GIT repository version of the code because there could be new improvements.

HAProxy Tanzu Deployment:

<#
    Script: HAProxy Tanzu Deployment
    Author: M. Buijs
    Original concept developed by: William Lam - https://github.com/lamw/vmware-scripts/blob/master/powershell/deploy_3nic_haproxy.ps1
    version: 1.0 - 2021-12-17
    Execution: HAProxy_Deployment.ps1
#>

# Set variables

	# Script variables
	$global:script_name = "HAProxy_Tanzu_Deployment"
	$global:script_version = "v1.0"
	$global:debug = 0
    $global:temp_directory = "C:\Temp\"

    # vSphere
    $vCenter = "LAB-VC01.Lab.local"
    $ClusterName = "Lab"
    $DatastorePrefix = "iSCSI - Production - *" # datastore prefix
    $DiskProvisioning = "thin" # thin or thick
    $Hardware = "v14" # Virtual hardware

    # HAProxy General
    $HAProxyDisplayName = "LAB-HAProxy01"
    $HAProxyHostname = "lab-haproxy01.lab.local"
    $HAProxyDNS = "192.168.126.21, 192.168.126.22"
    $HAProxyPort = "5556" # 5556 default port

    # HAProxy Management
    $HAProxyManagementNetwork = "Management"
    $HAProxyManagementIPAddress = "192.168.151.40/24" # Format is IP Address/CIDR Prefix
    $HAProxyManagementGateway = "192.168.151.254"

    # HAProxy Frontend
    $HAProxyFrontendNetwork = "TKG - Frontend"
    $HAProxyFrontendIPAddress = "192.168.127.40/24" # Format is IP Address/CIDR Prefix
    $HAProxyFrontendGateway = "192.168.27.254"
    $HAProxyLoadBalanceIPRange = "192.168.127.128/26" # Format is Network CIDR Notation

    # HAProxy Workload
    $HAProxyWorkloadNetwork = "TKG - Workload"
    $HAProxyWorkloadIPAddress = "192.168.128.40/24" # Format is IP Address/CIDR Prefix
    $HAProxyWorkloadGateway = "192.168.128.254"

    # HAProxy Users
    $HAProxyUsername = "haproxy_api"

# Functions
function banner {
    # Clear
	Clear-Host

	# Clear errors
	$Error.clear()

    # Message
    Write-Host "`n---------------------------------------------------------" -foreground Red
    Write-Host "               $script_name - $script_version" -foreground Red
    Write-Host "---------------------------------------------------------" -foreground Red
}

function script_exit {
	Write-Host -Foreground Yellow ""
	Write-Host -Foreground Yellow "ERROR Message: $($Error[0].Exception.Message)"
	Write-Host -Foreground Yellow ""
	Write-Host -Foreground Cyan "Exiting PowerShell Script..."
	exit
}

function validate_media {
    ##### Message
    Write-Host "`nValidating media:"

        #### Locate temp directory
        If (-not (Test-Path "$($Temp_Directory)")) {
            Write-Host -ForegroundColor Red "- The temp directory is not created ($Temp_Directory)"
            script_exit
        }
        else {
            Write-Host -ForegroundColor Green "- Located the temp directory ($Temp_Directory)"
        }

        #### Locate OVA file
        Try {
            Write-Host -ForegroundColor Green  "- Searching for OVA file"
            $script:OVF_HAProxy = $(Get-ChildItem -Path "$Temp_Directory" -Include haproxy-v*.ova -File -Recurse -ErrorAction Stop | Sort-Object LastWriteTime | Select-Object -last 1)

            ### In case of no results
            if ([string]::IsNullOrEmpty($OVF_HAProxy.name)) {
                throw
            }
            #### Message
            Write-Host -ForegroundColor Green "- Located HAProxy OVA file ($($OVF_HAProxy.Name))"
        }
        Catch {
            Write-Host -ForegroundColor Red  "- Could not find HAProxy OVA file in location ($Temp_Directory)"
            script_exit
        }
}

function ask_passwords {
    # Banner
    Write-Host "`nPasswords:"

    # Ask passwords
    $script:HAProxyOSPassword = Read-Host -asSecureString "- Enter the HAProxy user password (root)"
    $script:HAProxyPassword = Read-Host -asSecureString "- Enter the HAProxy user password ($HAProxyUsername)"

    # Validation
    If ($HAProxyOSPassword.Length -eq 0) {
        Write-Host -ForegroundColor Red "- HAProxy root account password is empty"
        script_exit
    }
    # Validation
    If ($HAProxyPassword.Length -eq 0) {
        Write-Host -ForegroundColor Red "- HAProxy user account password is empty"
        script_exit
    }
}

function connect_vcenter {
    # Banner
    Write-Host "`nvCenter connection:"

        # Disable vCenter deprecation warnings
        Set-PowerCLIConfiguration -DisplayDeprecationWarnings $false -Confirm:$false | Out-Null

        # Disable vCenter certification errors
        Set-PowerCLIConfiguration -InvalidCertificateAction "ignore" -Confirm:$false | Out-Null

        # Determine script or user input
        if ($vCenter) {
            Write-Host -ForegroundColor Green "- Connecting with vCenter server ($vCenter)"
        }
        else {
            # Ask required vCenter information
            $script:vCenter = Read-Host "- Enter the vCenter IP address or hostname"
        }

        if ($global:DefaultVIServers.Count -gt 0) {
            Write-Host -ForegroundColor Green "- Session already established ($vCenter)"
        }
        else {
            # Check IP address for connectivity
            if (test-connection -computername $vCenter -count 1 -quiet -ErrorAction SilentlyContinue) {
                Write-Host -ForegroundColor Green "- Host is alive ($vCenter)"
            }
            else {
                Write-Host -ForegroundColor Red "- Host is not responding ($vCenter)"
                $vCenter = ""
                Break
            }

            # Connect with vCenter
            try {
                Write-host -ForegroundColor Green "- Connecting to vCenter, please wait..."

                # Connect to vCenter
                Connect-ViServer -server $vCenter -ErrorAction Stop | Out-Null
            }
            catch [Exception]{
                $status = 1
                $exception = $_.Exception
                Write-Host "- Could not connect to vCenter, exiting script" -foreground Yellow
                Write-Host ""
                Write-Host "Exit code: $status" -foreground Yellow
                Write-Host "Output: $exception" -foreground Yellow
                Break
            }
        }

        # Message
        Write-Host -ForegroundColor Green "- Connection successful"
}

function ovf_config {
    # Banner
    Write-Host "`nOVF Configuration:"

    # Start
    Write-Host -ForegroundColor Green "- Creating OVF Configuration"

    $script:ovfconfig = Get-OvfConfiguration $OVF_HAProxy

    # Three nic configuration
    $script:ovfconfig.DeploymentOption.value = "frontend"

    # General
    $script:ovfconfig.network.hostname.value = $HAProxyHostname
    $script:ovfconfig.network.nameservers.value = $HAProxyDNS
    $script:ovfconfig.loadbalance.dataplane_port.value = $HAProxyPort

    # Network port groups
    $script:ovfconfig.NetworkMapping.Management.value = $HAProxyManagementNetwork
    $script:ovfconfig.NetworkMapping.Frontend.value = $HAProxyFrontendNetwork
    $script:ovfconfig.NetworkMapping.Workload.value = $HAProxyWorkloadNetwork

    # Management
    $script:ovfconfig.network.management_ip.value = $HAProxyManagementIPAddress
    $script:ovfconfig.network.management_gateway.value = $HAProxyManagementGateway

    # Workload
    $script:ovfconfig.network.workload_ip.value = $HAProxyWorkloadIPAddress
    $script:ovfconfig.network.workload_gateway.value = $HAProxyWorkloadGateway
    $script:ovfconfig.loadbalance.service_ip_range.value = $HAProxyLoadBalanceIPRange

    # Accounts
    $script:ovfconfig.loadbalance.haproxy_user.value = $HAProxyUsername

    # Password root
    $BSTR1 = [System.Runtime.InteropServices.Marshal]::SecureStringToBSTR($HAProxyOSPassword)
    $HAProxyOSPassword = [System.Runtime.InteropServices.Marshal]::PtrToStringAuto($BSTR1)
    $script:ovfconfig.appliance.root_pwd.value = $HAProxyOSPassword

    # Password user
    $BSTR2 = [System.Runtime.InteropServices.Marshal]::SecureStringToBSTR($HAProxyPassword)
    $HAProxyPassword = [System.Runtime.InteropServices.Marshal]::PtrToStringAuto($BSTR2)
    $script:ovfconfig.loadbalance.haproxy_pwd.value = $HAProxyPassword

    # Finish
    Write-Host -ForegroundColor Green "- Completed OVF Configuration"
}

function pre_deployment {
    # Banner
    Write-Host "`nPre-deployment:"

    # Cluster
    $script:Cluster = Get-Cluster $ClusterName
    Write-Host -ForegroundColor Green "- Selected cluster ($Cluster)"

    # VMhost
    $script:VMHost = Get-VMHost | Where-Object { $_.ConnectionState -eq "Connected" } | Get-Random
    Write-Host -ForegroundColor Green "- Selected ESXi Host ($VMHost)"

    # Datastore
    $script:Datastore = Get-VMhost -Name $VMHost | Get-Datastore -Name $DatastorePrefix | Select-Object Name, FreeSpaceGB | Sort-Object FreeSpaceGB -Descending | Select-Object -first 1 | Select-Object Name -expandproperty name
    Write-Host -ForegroundColor Green "- Selected datatore ($Datastore)"

    # Check virtual machine name exists
    $VMname_check_query = Get-Cluster -Name $ClusterName | Get-VM -name $HAProxyDisplayName -ErrorAction SilentlyContinue

    if (! $VMname_check_query) {
        Write-Host -ForegroundColor Green "- Virtual machine name is not in use ($HAProxyDisplayName)"
    }
    else {
        Write-Host -ForegroundColor Red "- Virtual Machine with name ($HAProxyDisplayName) already exists. Exiting script cannot continue!"
        script_exit
    }

	#### Ask for conformation
	Write-Host "`nThis task is going to build the HAProxy virtual machine for TKGs."
	$confirmation = Read-Host "Are you sure you want to proceed? [y/n]"

	if ($confirmation -eq 'n') {
		Write-Host "Operation cancelled by user!" -Foreground Red
		base_exit
	}

	if (!$confirmation) {
		Write-Host -Foreground Red "No input detected!"
	    base_exit
	}
}

function deployment {
    # Banner
    Write-Host "`nDeployment:"

	# HAProxy deployment of OVF
	try {
		### Message
		Write-Host -ForegroundColor Green "- Starting HAProxy Deployment ($HAProxyHostname / $HAProxyManagementIPAddress)"

        $script:vm = Import-VApp -Source $OVF_HAProxy -OvfConfiguration $ovfconfig -Name $HAProxyDisplayName -Location $Cluster -VMHost $VMHost -Datastore $Datastore -DiskStorageFormat $DiskProvisioning

        ### Message
		Write-Host -ForegroundColor Green "- Finished HAProxy Deployment ($HAProxyHostname / $HAProxyManagementIPAddress)"
    }
	catch [Exception]{
		Write-Host -ForegroundColor Red "- HAProxy Deployment Failed ($HAProxyHostname / $HAProxyManagementIPAddress)"
		script_exit
	}
}

function post_deployment {
    # Banner
    Write-Host "`nPost-deployment:"

	# Configure OVF
	try {
		### Message
		Write-Host -ForegroundColor Green "- Starting HAProxy OVF Configuration ($HAProxyHostname / $HAProxyManagementIPAddress)"

        $vappProperties = $vm.ExtensionData.Config.VAppConfig.Property
        $spec = New-Object VMware.Vim.VirtualMachineConfigSpec
        $spec.vAppConfig = New-Object VMware.Vim.VmConfigSpec

        $ovfChanges = @{
            "frontend_ip"=$HAProxyFrontendIPAddress
            "frontend_gateway"=$HAProxyFrontendGateway
        }

        ### Message
		Write-Host -ForegroundColor Green "- Finished HAProxy OVF Configuration ($HAProxyHostname / $HAProxyManagementIPAddress)"
    }
	catch {
		Write-Host -ForegroundColor Red "- HAProxy OVF Configuration failed ($HAProxyHostname / $HAProxyManagementIPAddress)"
		script_exit
	}

    try {
        # Message
		Write-Host -ForegroundColor Green "- Starting HAProxy Update Specification ($HAProxyHostname / $HAProxyManagementIPAddress)"

        # Retrieve existing OVF properties from VM
        $vappProperties = $VM.ExtensionData.Config.VAppConfig.Property

        # Create a new Update spec based on the # of OVF properties to update
        $spec = New-Object VMware.Vim.VirtualMachineConfigSpec
        $spec.vAppConfig = New-Object VMware.Vim.VmConfigSpec
        $propertySpec = New-Object VMware.Vim.VAppPropertySpec[]($ovfChanges.count)

        # Find OVF property Id and update the Update Spec
        foreach ($vappProperty in $vappProperties) {
            if($ovfChanges.ContainsKey($vappProperty.Id)) {
                $tmp = New-Object VMware.Vim.VAppPropertySpec
                $tmp.Operation = "edit"
                $tmp.Info = New-Object VMware.Vim.VAppPropertyInfo
                $tmp.Info.Key = $vappProperty.Key
                $tmp.Info.value = $ovfChanges[$vappProperty.Id]
                $propertySpec+=($tmp)
            }
        }
        $spec.VAppConfig.Property = $propertySpec

        # Message
		Write-Host -ForegroundColor Green "- Finished HAProxy Update Specification ($HAProxyHostname / $HAProxyManagementIPAddress)"
    }

    catch {
        # Message
        Write-Host -ForegroundColor Red "- HAProxy Update Specification failed ($HAProxyHostname / $HAProxyManagementIPAddress)"
		script_exit
    }

    # HAProxy reconfigure task for virtual machine
    try {
        # Message
        Write-Host -ForegroundColor Green "- Start Reconfigure VM task ($HAProxyHostname / $HAProxyManagementIPAddress)"
        $task = $vm.ExtensionData.ReconfigVM_Task($spec)
        $task1 = Get-Task -Id ("Task-$($task.value)")
        $task1 | Wait-Task | Out-Null
    }
    catch {
        Write-Host -ForegroundColor Red "- Reconfigure VM task failed ($HAProxyHostname / $HAProxyManagementIPAddress)"
        script_exit
    }

    # Message
    Write-Host -ForegroundColor Green "- Completed the reconfigure VM task ($HAProxyHostname / $HAProxyManagementIPAddress)"
}

function boot {
    # Banner
    Write-Host "`nBoot:"

	# Upgrade Virtual Hardware
	Try {
		Write-Host -ForegroundColor Green "- Upgrade Virtual Hardware ($HAProxyHostname / $HAProxyManagementIPAddress)";
		Get-VM -Name $vm | Set-VM -Version $Hardware -Confirm:$false | Out-Null
	}
	Catch {
		Write-Host -ForegroundColor Red "- Upgrade Virtual Hardware failed ($HAProxyHostname / $HAProxyManagementIPAddress)";
		script_exit
	}

	# Power-On Virtual Machine
	Try {
		Write-Host -ForegroundColor Green "- Power-on HAProxy started ($HAProxyHostname / $HAProxyManagementIPAddress)"
		Get-VM $vm | Start-VM | Out-Null
	}
	Catch {
		Write-Host -ForegroundColor Red "- Starting HAProxy failed ($HAProxyHostname / $HAProxyManagementIPAddress)"
		script_exit
	}

    Write-Host -ForegroundColor Green "- Power-on HAProxy completed ($HAProxyHostname / $HAProxyManagementIPAddress)"
}

function check {
    # Banner
    Write-Host "`nCheck:"

    # Set total of retries
    $TOTAL = "10"

    # Host retry interval (seconds)
	$HOST_WAIT = "10";

    # Start loop
    For ($i=0; $i -le $TOTAL; $i++) {

        # Number conversion to 2 digit:
        $NUMBER = [INT]$i + 1
        $NUMBER = "{0:D2}" -f $NUMBER

        # Check Host
        $Host_check_query = Test-Connection -computername $HAProxyHostname -count 1 -quiet -ErrorAction SilentlyContinue

        # Validate, else retry after a wait
        if ($Host_check_query -eq $false) {
            Write-Host -Foregroundcolor green "- [$NUMBER/$TOTAL] Checking HAProxy availability ($HAProxyHostname)"
            Start-Sleep $HOST_WAIT
        }
        else {
            Write-Host -Foregroundcolor green "- [$NUMBER/$TOTAL] Checking HAProxy availability ($HAProxyHostname)"
            Write-Host -Foregroundcolor green "- [Ready] HAProxy is available ($HAProxyHostname)"
            break
        }
    }
}

function retrieve_certificate {
    # Banner
    Write-Host "`nRetrieve certificate:"

    # Build URL
    $script:url = "https://${HAProxyHostname}:${HAProxyPort}/v2/info"

    # Configure local system
    try {
        # Message
        Write-Host -ForegroundColor Green "- Disable certificate checking on local system"

        # Disable certificate check
        [System.Net.ServicePointManager]::ServerCertificateValidationCallback = {$true}
    }
	catch {
		Write-Host -ForegroundColor Red "- Could not disable certificate checking on local system"
		script_exit
	}

    # Download certificate
    try {
        # Message
        Write-Host -ForegroundColor Green "- Get HAProxy certificate ($url)"

        $req = [Net.HttpWebRequest]::Create($url)
        $req.ServicePoint | Out-Null

        # Authentication
        $req.Credentials = New-Object Net.NetworkCredential($HAProxyUsername, $HAProxyPassword);
    }
	catch {
		Write-Host -ForegroundColor Red "- Could not get HAProxy Certificate ($url)"
		script_exit
	}

    # Store error messages in variable to not crash a try and catch statement.
    $GetResponseResult = $req.GetResponse()

    # Store certificate as X.509 file
    try {
        # Message
        Write-Host -ForegroundColor Green "- Store HAProxy certificate as X.509 ($url)"

        $cert = $req.ServicePoint.Certificate
        $bytes = $cert.Export([Security.Cryptography.X509Certificates.X509ContentType]::Cert)
        set-content -value $bytes -encoding byte -path "$pwd\$HAProxyHostname.cer"
    }
    catch {
        Write-Host -ForegroundColor Red "- HAProxy X.509 certificate could not be saved ($url)"
        Write-Host -ForegroundColor Red "- Result from GetResponse: ($GetResponseResult)";
        script_exit
    }

    # Convert certificate to Base-64 file
    try {
        # Message
        Write-Host -ForegroundColor Green "- Store HAProxy certificate as Base-64 ($url)"

        $InsertLineBreaks=1
        $sMyCert="$pwd\$HAProxyHostname.cer"
        $oMyCert = New-Object System.Security.Cryptography.X509Certificates.X509Certificate2($sMyCert)
        $oPem = New-Object System.Text.StringBuilder
        $oPem.AppendLine("-----BEGIN CERTIFICATE-----") | Out-Null
        $oPem.AppendLine([System.Convert]::ToBase64String($oMyCert.RawData,$InsertLineBreaks)) | Out-Null
        $oPem.AppendLine("-----END CERTIFICATE-----") | Out-Null
        $oPem.ToString() | out-file "$pwd\$HAProxyHostname.pem"
    }
    catch {
        Write-Host -ForegroundColor Red "- HAProxy Base-64 certificate could not be saved ($url)"
        script_exit
    }
}

function complete_banner {
    # Message
    Write-Host -ForegroundColor Green "- HAProxy deployment completed successfully! ($HAProxyHostname / $HAProxyManagementIPAddress)"
}

##### Main
banner
validate_media
connect_vcenter
ask_passwords
ovf_config
pre_deployment
deployment
post_deployment
boot
check
retrieve_certificate
complete_banner

Wrap-up

I hope this blog about HAProxy unattended deployment was useful for some people or that the PowerShell code inspires people to deploy other types of OVA appliances.

If you got any improvements please commit them to the GIT repository and if you got any questions please respond below. Thank you for reading my blog post and see you next time!

VMware Tanzu HAProxy Troubleshooting

This blog post is dedicated to HAProxy Troubleshooting for vSphere with Tanzu or also known as TKGs. Based on your configuration and deployment and the various items you need to configure you can make mistakes or items are not correctly configured. In my case, there were multiple problems at different deployments with parameters and reachability related to the network. In the end, after all the hours of troubleshooting, I ended up with a list of commands that might help others out. So that is the topic of this blog post.

HAProxy Background

First an introduction about the product HAProxy. HAProxy is a load balancer that is used by vSphere with Tanzu. This is not mandatory but is a product to choose from. The main reason for HAProxy compared to the others is that it is completed free/open-source. The HAProxy OVA is packaged and delivered by VMware and can be found in the following repository. All commands below have been tested against the HAProxy v0.2.0 version (haproxy-v0.2.0.ova) that is at the moment of writing the most recent version available.

Appliance access (SSH)

After a successful deployment, you can access the HAProxy appliance with an SSH session. This session can be established with a tool like PuTTY. The user account that should be used in the root account.

Keep in mind: Do not change configuration unless you absolutely know what you are doing. Almost all the issues I ran into were related to entering incorrect information into the deployment wizard or firewall issues.

Troubleshooting Services

One of the first things to check at first is that all services are running on the HAProxy appliance. When services are not started this is mostly caused by an invalid/incomplete configuration that is filled by the deployment wizard of the OVA.

### Check failed services
systemctl list-units --state=failed

### Check primary services for HAProxy and Tanzu Integration
systemctl status anyip-routes.service
systemctl status haproxy.service

### Restart services
systemctl restart haproxy

Troubleshooting Configuration Files

There are multiple configuration files in use by HAProxy here are the most important ones. Also, keep in mind what I already said before… do not change anything unless…

### Anyip-routes configuration file
cat /etc/vmware/anyip-routes.cfg

### HAProxy configuration file
cat /etc/haproxy/haproxy.cfg

### HAProxy dataplane api configuration file
cat /etc/haproxy/dataplaneapi.cfg

### Validation of configuration file
haproxy -c -f /etc/haproxy/haproxy.cfg

Troubleshooting HAProxy process output

Sometimes it is good to check the latest messages generated by the HAProxy process. There will be information about the startup of the process and the pool members.

### Show logging
journalctl -u haproxy.service --since today --no-pager

Troubleshooting IP Settings

By entering wrong IP information in the deployment wizard the configuration files surrounding the IP address settings, gateway, etc can be configured incorrectly. What I noticed is there is not really a check inside the deployment that verifies if the address that is entered is valid in any sort of way.

### List IP Settings
ifconfig

### Config files (incase of three NIC configuration)
cat /etc/systemd/network/10-frontend.network
cat /etc/systemd/network/10-workload.network
cat /etc/systemd/network/10-management.network

### Routing check
route
ip route

Troubleshooting Certificates

Certificates files used by the HAProxy application are inside the HAProxy directory on the local system. The certificates are BASE-64 encoded!

### Certificate authority file:
cat /etc/haproxy/ca.crt

### Certificate server file:
cat /etc/haproxy/server.crt

### Certificate URL by default:
https://%HAProxy-Management-IP%:5556

Troubleshooting NTP

One of the all-time favorites that are notorious for disrupting IT systems is off course NTP. Here are some commands for troubleshooting on Photon OS.

### Check service status
systemctl status systemd-timesyncd

### Show NTP peers
ntpq -p

### Restart service
systemctl restart systemd-timesyncd

### Configuration file
cat /etc/systemd/timesyncd.conf

Troubleshooting the HAProxy API

The HAProxy API is used by Tanzu to configure HAProxy for the management and workload components. Authentication is set up when deploying the OVA and the credentials are entered in the wizard. With the second URL you can verify those credentials:

### Info page
https://%IP-address%:5556/v2/info

### Authentication should work with the HAProxy user account (specified in the deployment wizard)
https://%IP-address%:5556/v2/cluster

Wrapup

Thank you for reading this blog post about HAProxy troubleshooting for vSphere with Tanzu or in short TKGs. I hope it was useful to you! If you got something to add? Have additional tips or remarks please respond in the comment section below.

Have a nice day and see you next time.

Source

PowerCLI Update Fails on Certificate Issue

Today I was updating my PowerShell modules on my local system but I ran into an issue related to certificates. After some investigation, it appeared that the PowerCLI Update was failing. Every PowerCLI module that it tried to update returned an error and did not update to a newer version. In this blog post, I am showing you how to get rid of this error and you will be able to update PowerCLI again to the latest version.

Environment

Here is a quick summary of my environment where the issue occurred:

  • Current PowerCLI: 12.1.0.16997004
  • The system tried to update PowerCLI to: 12.4.0.18627054
  • Operating System: Windows 10 Pro (21H1)

Problem

Here is an overview of the PowerShell command I used to update my modules. Also, the error message is listed below in the code box. As you can see PowerShell is complaining about a DigiCert certificate and that it is not save to update because of the certificate change.

# Open a PowerShell command prompt with administrative permissions

# Enter the command to update the PowerShell modules
Update-Module

# The following error message appears
Install-Package: Authenticode issuer 'CN=DigiCert Trusted Root G4, OU=www.digicert.com, O=DigiCert INc, C=US' of the new module 
'VMware.VimAutomation.Sdk' with version '12.4.0.18627054' is not matching with the authenticode issuer 'CN=VeriSign Class 3 Public Primary Certification 
Authority - G5, OU="(c) 2006 VeriSign, Inc. - for authorized use only", OU=VeriSign Trust Network, O="VeriSign, Inc.", C=US' of the previously-installed
 module 'VMware.VimAutomation.Sdk' with version '12.1.0.16997004'.

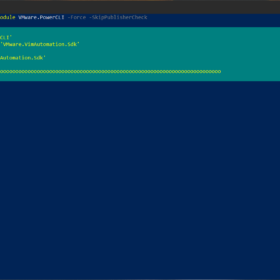
Here is a screenshot of the error message, error message is listed in red text. It also shows the commands I used for the PowerCLI update on my local system.

Solution

The solution for fixing the issue is quite simple. Just reinstall the VMware PowerCLI modules on your local system. This needs to be done in a forced way but after that, you are done.

# Open a PowerShell command prompt with administrative permissions

# Enter the command to re-install the PowerShell modules
Install-Module VMware.PowerCLI -Force -SkipPublisherCheck

# Wait a couple of minutes and everything should be upgraded.
Get-Module -ListAvailable VMware.PowerCLI | Select-Object Name, Version

As you can see in the screenshots below the PowerCLI update is working and is returning no errors after the upgrade.

Wrap-up

This wraps up this small blog post about a PowerCLI update issue in PowerShell. Thank you for reading and I hope it helped you out. Please respond in the comment section below if you have any questions or remarks!

VMware vCenter SNMP Configuration

VMware vSphere 6.7 Logo

In this last blog of the year, we are going to set up the SNMP agent on VMware vCenter Server. This blog will cover the vCenter SNMP configuration and I will show some debugging examples to verify the working of the SNMP Agent. In my case, I am using Zabbix Server as the monitoring program to verify the status of my VMware vCenter Server in my lab environments. This reduces the amount of manual troubleshooting and ensures that services are running as expected.

The reason why I did this write-up was because of the lack of documentation from the vendor’s website. As you can see in the source pages below there is a limited set of commands and nearly no examples. To set up my environment I needed some additional commands to get everything working correctly.

Environment

The environment where I configured the SNMP agent was on a VMware vCenter Server 6.7 update 3 (VCSA /appliance). I am monitoring the VMware vCenter Server with a Zabbix Server that is running on CentOS 8. I am currently using SNMP v2 in this example because it is used by most people.

Keep in mind: SNMP v1 and v3 are also supported by both products. My recommendation is to use SNMP v3 of course because of the security improvements like authentication & encryption :).

SNMP

A quick explanation about SNMP (thanks Wikipedia): Simple Network Management Protocol (SNMP) is an Internet Standard protocol for collecting and organizing information about managed devices on IP networks and for modifying that information to change device behavior. Devices that typically support SNMP include cable modems, routers, switches, servers, workstations, printers, and more.

SNMP is widely used in network management for network monitoring. SNMP exposes management data in the form of variables on the managed systems organized in a management information base (MIB) which describes the system status and configuration. These variables can then be remotely queried (and, in some circumstances, manipulated) by managing applications.

Commands

Here are the commands I have used for the vCenter SNMP configuration. Note: make sure you have access to the root account to perform the login.

# Step 1: Start an SSH connection with the vCenter Server (use Putty or something equivalent).

# Step 2: Login as the root user

# Step 3: After a successful login you should be in the appliance Shell.

# Step 4: View the current configuration for SNMP
snmp.get

# Step 5: Configure the SNMP Community (in this example I use MySnmpCommunity)
snmp.set --communities MySnmpCommunity

# Step 6: Allow a device to access the SNMP agent (192.168.10.10 = monitoring server)
snmp.set --targets 192.168.10.10@161/MySnmpCommunity,172.0.0.1@161/MySnmpCommunity,localhost@161/MySnmpCommunity

# Step 7: Enable the SNMP Agent
snmp.enable

# Step 7: Verify the SNMP Settings configured
snmp.get

# Step 8: Test the working (in my case it never works... not sure why? Has something to do with my access restrictions?)
snmp.test

# Step 9: Perform a test from the monitoring server (in my case a Linux machine with snmpwalk)
snmpwalk -v2c -c MySnmpCommunity %hostname-vcenter%

Screenshots

Here are some screenshots related to the SNMP configuration:

Wrap-up

So that is it! Hopefully, this blog post was useful and this wraps-up 2020. See you next year and if you have any comments please respond below.

Sources

Here are some sources I used when configuring SNMP on VMware vCenter Server:

vSphere 6.7 Convergence Tool: Failed to get vecs users and permissions

Last week I was converting a vSphere 6.7 Update 1 environment from external PSC to embedded PSC. After a couple of seconds running the conversion, it ended in an error message (Failed to get vecs users and permissions).

The customer was using the latest available vCenter 6.7 update 1 release available at this point vCenter Appliance 6.7 U1b (11727113). The environment consists of one Platform Services Controller (PSC) and one vCenter Server (VC) and a couple of VMware ESXi 6.7 Update 1 hosts.


Error Message

The error message in my PowerShell window displayed the following error message. Not really the best message (possible resolution is []) but it pointed me in the right direction.

### PowerShell output from vcsa-util.exe
2019-05-07 11:07:58,538 [loggable.py:102]: ================ [FAILED] Task: MonitorPSCDeployTask: Running MonitorPSCDeployTask execution failed at 11:07:58 ================
2019-05-07 11:07:58,553 [loggable.py:102]: Task 'MonitorPSCDeployTask: Running MonitorPSCDeployTask' execution failed because [ERROR: Converge Process Failed!], possible resolution is []
2019-05-07 11:07:58,553 [loggable.py:102]: ================================================================================
2019-05-07 11:07:58,631 [taskflow.py:943]: <MonitorPSCDeployTask - com.vmware.vcsa.installer.converge.monitor_psc_deploy(FAILED)> in <ConvergeTaskFlow - converge(FAILED)> status changed to: FAILED
2019-05-07 11:07:58,694 [taskflow.py:641]: Execution attempt 1 for Task <MonitorPSCDeployTask - com.vmware.vcsa.installer.converge.monitor_psc_deploy(FAILED)> FAILED with exception: ERROR: Converge Process Failed!
2019-05-07 11:07:58,694 [taskflow.py:672]: Finished executing <MonitorPSCDeployTask - com.vmware.vcsa.installer.converge.monitor_psc_deploy(FAILED)> and its status is FAILED
2019-05-07 11:07:58,694 [taskflow.py:675]: <ConvergeTaskFlow - converge(FAILED)> overall status is now FAILED

Inside the “converge_mgmt.log” logfile the following error was displayed see output below. The log file can be found on the following location on your local system: “C:\Users\User\AppData\Local\Temp\vcsaCliInstaller-2019-05-07-11-25-6pn5b67r\workflow_1557228307149\converge\converge_mgmt.log“. Keep in mind, the file path is dynamic and I was using Microsoft Windows.

2019-05-07T11:07:46.688Z ERROR converge Failed to get vecs users and permissions. Error: {
    "componentKey": null,
    "problemId": null,
    "detail": [
        {
            "id": "install.ciscommon.command.errinvoke",
            "localized": "An error occurred while invoking external command : 'Command: ['/usr/lib/vmware-vmafd/bin/vecs-cli', 'entry', 'getcert', '--store', 'APPLMGMT_PASSWORD', '--alias', 'location_password_default', '--output', '/root/velma/old_certs/APPLMGMT_PASSWORD.crt']\nStderr: Error: No certificates were found for entry [location_password_default] of type [Secret Key].\nvecs-cli failed. Error 87: Operation failed with error ERROR_INVALID_PARAMETER (87) \n'",
            "translatable": "An error occurred while invoking external command : '%(0)s'",
            "args": [
                "Command: ['/usr/lib/vmware-vmafd/bin/vecs-cli', 'entry', 'getcert', '--store', 'APPLMGMT_PASSWORD', '--alias', 'location_password_default', '--output', '/root/velma/old_certs/APPLMGMT_PASSWORD.crt']\nStderr: Error: No certificates were found for entry [location_password_default] of type [Secret Key].\nvecs-cli failed. Error 87: Operation failed with error ERROR_INVALID_PARAMETER (87) \n"
            ]
        }
    ],
    "resolution": null
}
2019-05-07T11:07:46.706Z INFO converge Cleanup successful with partial flag = True.


Solving the issue

After searching on Google on the string “ERROR converge Failed to get vecs users and permissions“. I got a hit on a VMware KB article. The VMware article can be found below and explained what was going wrong.

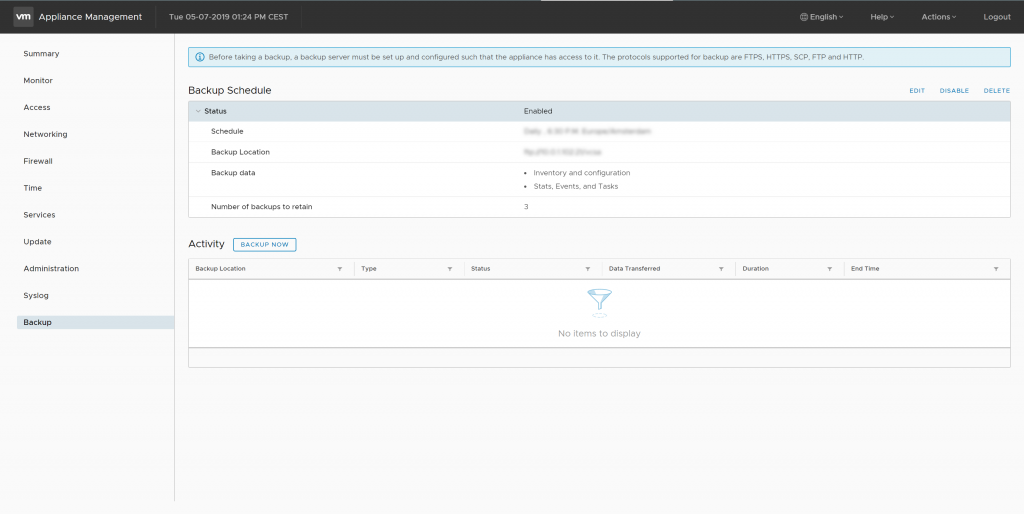
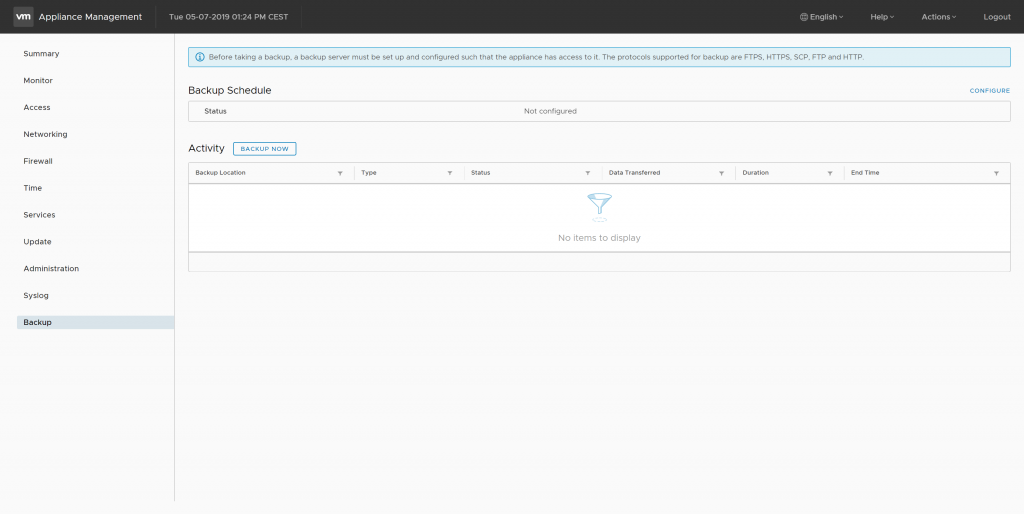
The solution is very simple… remove the vCenter Backup Schedule in the VAMI (VMware Appliance Management Interface):

Procedure:

  1. Log into the vCenter Server Appliance Management Interface (https://%vcenter-fqdn%:5480)
  2. Login with the root account.
  3. Navigate to the Backup view
  4. Next to Backup Schedule, click the Delete button to delete the current backup schedule
  5. Attempt the convergence process again!
  6. Once the convergence is complete, re-create the backup schedule. See Schedule a File-Based Backup for more information on creating a backup schedule.

Community Feedback

I got the following feedback on this article after publishing:

  • Update 08-04-2019: David Stamen reached out to me on Twitter with the response: This was fixed in #vSphere67U2.

Sources

The following websites were very usefull for troubleshooting this issue:

Changing VMware Storage Controller to Paravirtual for CentOS 7

In this post, we are going to change the Virtual Storage Controller from LSI Logic Parallel to VMware Paravirtual for a CentOS 7 based Virtual Machine that is running on VMware vSphere. This blog post will contain step-by-step guidance for performing the operation.

In my case the virtual machine was built in VMware Workstation and after some time migrated to VMware ESXi. The VMware Paravirtual Storage Controller is not supported in VMware Workstation. That is why the virtual machine came over with the “wrong” storage controller.

My 24×7 Lab environment is running shared iSCSI based storage and all virtual machines are thin provisioned. The Virtual Machine that came over from VMware Workstation is installed with CentOS 7.

Why VMware Paravirtual?

Why should you want to migrate from an LSI Logic Parallel to a VMware Paravirtual SCSI Controller? Two simple reasons and they are two good ones:

  • Lower CPU utilization
  • Higher Throughput

Personally, I have a third reason to add… compliance. All my virtual machines should be compliant with the VMware Best Practice and my personal Home Lab standard. In my Lab environment, this means using the VMware Paravirtual where ever possible/supported.

VMware Official Statement 1:

PVSCSI adapters are high-performance storage adapters that can result in greater throughput and lower CPU utilization. PVSCSI adapters are best for environments, especially SAN environments, where hardware or applications drive a very high amount of I/O throughput. The VMware PVSCSI adapter driver is also compatible with the Windows Storport storage driver. PVSCSI adapters are not suitable for DAS environments.VMware Paravirtual SCSI adapters are high-performance storage adapters that can result in greater throughput and lower CPU utilization.

VMware Official Statement 2:

The PVSCSI adapter offers a significant reduction in CPU utilization as well as potentially increased throughput compared to the default virtual storage adapters, and is thus the best choice for environments with very I/O-intensive guest applications.

Procedure

The most important step in the process is to make sure you have a valid backup! After that, it is just following the steps described below:

  • Create a virtual machine snapshot or backup before you begin.
  • Power-off the virtual machine.
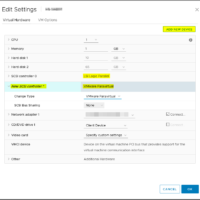
  • Add the VMware Paravirtual Controller to the Virtual Machine. Do not change the disk controller assignment yet, only add the storage controller to the VM (screenshot 01).
  • Power-on the virtual machine.
  • Login with an account on the virtual machine (account must be able to obtain root access).
  • Start rebuilding the initial ramdisk image (screenshot 02):
    mkinitrd -f -v /boot/initramfs-$(uname -r).img $(uname -r)
  • Power-off the virtual machine.
  • Assign disks to the new storage controller and remove the old storage controller (screenshot 03).
  • Power-on the virtual machine.
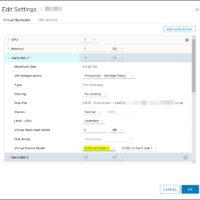
  • Validate that everything is working and disks are mounted (screenshot 04).
  • Remove the virtual machine snapshot or backup after you are done.

Screenshots

Here are some screenshots from the procedure:

Conclusion

At this point, I have swapped out three virtual machines from the LSI controller to the VMware Paravirtual SCSI Controller. The machines have been running now for about two weeks without any problems. So everything is compliant again ;).

If you encounter any problems or have any questions about this subject please feel free to contact me on Twitter or the Reply option below.

Source

Here are some interesting related articles that I used for creating this blog post:

VMworld 2018 US Announcements

VMworld 2018 US - Featured Images

This blog post is dedicated to the VMworld 2018 US announcements. In the post, you will find the articles, links and highlights. VMworld 2018 US is an event that is organized by VMware. The US version is a five-day event that is held in Las Vegas. It takes place from 26 August to 30 August 2018. This page will be updated multiple times to coming days to add additional information and the latest announcements.

Please reply underneath this blog post if you have some additional information. This can also be additional links or blogs posts.

VMworld 2018 US – Product Announcements

In this chapter are all the product announcements. I can tell you there are a lot of announcements made at VMworld 2018.

vRealize Automation (vRA) 7.5

One the first day of VMworld 2018 US vRealize Automation 7.5 was announced.

The key highlights are:

  • Easy to Operate
    • Modernized vRealize Automation/vRealize Orchestrator(vRO) UI
    • Closed Loop Optimization with vRealize Operations
    • Enterprise-ready ServiceNow plugin
    • NSX-T On-premises Support
  • Built to Support Developers
    • Configuration Management with Ansible Tower
    • Kubernetes Cluster Management with VMware Pivotal Container Services (PKS)
  • Helps Embrace Multi-Cloud
    • AWS Enhancements
    • Azure Enhancements
    • Google Cloud Enhancements

Links:


vRealize Operations Manager (vROPS) 7.0

On the first day of VMworld 2018 US vRealize Operations Manager 7.0 was announced.

The key highlight are:

  • Enhanced User Interface
  • Automating Performance Based on Business and Operational Intent
  • Automated Host Based Placement, Driven by Business Intent
  • Capacity Analytics Enhanced with Exponential Decay and Calendar Awareness
  • Plan Capacity across Private Cloud and VMware Cloud on AWS
  • Simplified Dashboard Creation and Sharing
  • vRealize Operations AWS Management Pack Update
  • Other Miscellaneous Enhancements
    • Workload Right-sizing to avoid performance bottlenecks and reclaim over-allocated resources
    • Built-in vSphere config & compliance: PCI, HIPAA, DISA, FISMA, ISO, CIS
    • Ability to extend to the entire data center and cloud with updated management packs for Storage, vRO, Kubernetes, Federation etc.
    • vSAN performance, capacity, and troubleshooting including support for stretched clusters and through vRealize Operations plug-in in vCenter
    • Wavefront integration for application operations

Links:


vRealize Log Insight (vRLI) 4.7

On the first day of VMworld 2018 US vRealize Log Insight 4.7 was announced.

The key highlights are:

  • Security Improvements
    • Detailed verification of certificate when adding it to vRLI both from UI and REST API
    • Ability to retrieve current certificate details both from UI and REST API
    • LIAGENT_SSL_CA_PATH environment variable
  • Usability Enhancements
    • vCenter Integration now relies on user-provided hostname instead of trying to resolve it
    • Ability to choose the content packs, the fields of which should be dynamically extracted in the query result in Interactive Analytics
    • Improvements in the REST API
    • UI/UX improvements and bug fixes

Links:


vRealize Network Insight (vRNI) 3.9

On the first day of VMworld 2018 US vRealize Network Insight 3.9 was announced.

The key highlights are:

  • Plan micro-segmentation and get visibility for NSX Data Center, including NSX-T
  • Enhanced security for service access with Multi-factor Authentication
  • Custom dashboard support for Cisco ASA firewall and enhancements to Checkpoint Firewall support
  • Many customers are now using VMware Network Insight as a service, and customers based in Europe now also have the option of using the VMware Network Insight service hosted out of London, UK.

Links:


vCloud Director (vCD) 9.5

Just a couple of days before VMworld 2018 US vCloud Director 9.5 was announced:

The key highlights are:

  • Cross-site networking improvements powered by deeper integration with NSX
  • Initial integration with NSX-T
  • Full transition to an HTML5 UI for the cloud consumer
  • Improvements to role-based access control
  • Natively integrated data protection capabilities, powered by Dell-EMC Avamar
  • vCD virtual appliance deployment model

Links:


vSphere Platinum

On the first day of VMworld 2018 US, a new vSphere edition was announced. The product is called vSphere Platinum and it has a tight integration with VMware AppDefense.

The key highlights are:

  • Benefits for vSphere Admins
    • Gain visibility into the intent of each virtual machine, and a detailed inventory of application assets and context.
    • Understand how applications behave and be alerted to potential issues and deviations.
    • Shrink the attack surface and reduce the risk of security compromise.
      Establish a simple and powerful way to collaborate with security, compliance and application teams.
    • Get better visibility and protection with a simple, light-weight and scalable security solution, with no agents to manage, and minimal overhead.
    • Use what you already own, understand, and run in your data center – vSphere – with its unique visibility, automation and isolation qualities.
    • Play a larger and critical role in the security of your entire IT environment – Be the Security Hero!
  • Benefits for Security Teams
    • Better visibility and situational awareness of application behaviours, and virtual machine purpose.
    • Faster detection, analysis, and time to response – quickly understand attacks and make fast decisions using application context and scope.
    • Enhance existing security tools and support compliance efforts through contextual visibility and alerts into application communications and deviations.
    • Lower false positives – integrated behavioural analytics and machine learning offer a more precise method to identify and respond to threats.
    • Big data correlation for better identification and context using cloud SaaS model.
    • Security as an agile business enabler – support DevOps environment through continuous learning and protection.
    • Easily Coordinate with vSphere Admins and Application teams for better security while respecting existing workflows & maintaining separation of duties.
  • Secure Applications
    • VMware AppDefense – Protects the integrity of applications running on vSphere, using machine learning to monitor against threats and automate responses. AppDefense locks down the guest operating system for all applications, the VMware application stack and third-party applications.  To accomplish this, AppDefense gathers inventory data on virtual machines and applications from vCenter Server, development tools, and automation frameworks and applies machine learning to discover the intended state and establish the known good behaviours for the application and machine.  Any deviations from this state are detected and prevented, securing the integrity of the applications, infrastructure, and guest operating system. AppDefense provides detailed visibility for better change management and compliance reporting and also provides a rich set of automated or orchestrated incident response mechanisms to address attacks. Moreover, it leverages machine learning for a simple and automated way to conduct audits and reviews for applications.
  • Secure Data
    • FIPS 140-2 Validated VM Encryption, and cross-vCenter Encrypted vMotion – Secure against unauthorized data access both at rest and in motion, across the hybrid cloud.
      Secure Infrastructure
    • Secure Boot for ESXi – Allows only VMware and Partner signed code to run in your hypervisor.
      Secure Boot for Virtual Machines – Helps prevent images from being tampered with and prevents the loading of unauthorized components.
    • Support for TPM 2.0 for ESXi – Enables hypervisor integrity by validating the Secure Boot for ESXi process and enables remote host attestation.
    • Virtual TPM 2.0 – Provides the necessary support for guest operating system security features while retaining operational features such as vMotion and disaster recovery.
    • Support for Microsoft Virtualization Based Security – Supports Windows 10 and Windows 2016 security features, like Credential Guard, on vSphere.
  • Secure Access
    • Audit Quality Logging – Enables authorized administration and control by providing high fidelity visibility in vSphere operations.

Links:


vSphere 6.7 Update 1

On the first day of VMworld 2018 US vSphere 6.7 Update 1 was announced.

The key highlights are:

  • Fully Featured HTML5-based vSphere Client
  • Enhanced support for NVIDIA Quadro vDWS powered VMs; and Support for Intel FPGA
  • New vCenter Server Convergence Tool
  • Enhancements for HCI and vSAN
  • Enhanced vSphere Content Library

Links:


vSAN 6.7 Update 1

On the first day of VMworld 2018 US vSAN 6.7 Update 1 was announced.

The key highlights are:

  • Simplified Operations
    • Cluster Quickstart
    • Driver & Firmware Updates using Update Manager
    • Decommissioning and Maintenance Mode Safeguards in vSAN 6.7 U1
    • More vRealize Operations Intelligence
    • Improved Capacity Reporting
  • Efficient Infrastructure
    • TRIM/UNMAP Support
    • Mixed MTU Support for 2 Node and Stretched Clusters
    • Updated Sizing Tools
  • Rapid Support Resolution
    • Improved Health Check Guidance
    • Enhanced Support Diagnostics

Links:


VMware Validated Design 4.3

Also, the VMware Validated Design (VVD) received some new features and changes to the documentation. Personally, the greatest value in this release is the Visio stencils that are available for everyone.

The key highlights are:

  • Official NSX-T Support
  • Documentation Updates
    • IT Automating IT Scenarios
    • Intelligent Operations Scenarios
    • Introduction to Security and Compliance
    • Operational Verification
    • Certificate Replacement for 2-pod
    • Certificate Replacement for 1-pod
  • Architecture and Design of VMware PKS for Workload Domains
  • Design and Deployment of VMware Skyline
  • Architecture and Design Guidance for NIST 800-53
  • VVD Diagrams and Stencils

Links:


VMworld 2018 US – Technical Previews & Projects

There were also a lot of announcements surrounding some new developments/projects.

Project list:

  • Project Concord – Project Concord uses Byzantine fault-tolerant consensus protocols to deliver a functioning distributed trust system: one that is both “safe” and “alive.” Concord is a generic state machine replication library that can handle malicious (Byzantine) replicas.
  • Project Dimension – Project Dimension will extend VMware Cloud to deliver SDDC infrastructure and hardware as-a-service to on-premises locations.
  • Project Magna – Project Magna will make possible a self-driving data center based on machine learning.
  • RDS on VMware – VMware demonstrated how Amazon Web Service’s RDS service will run on VMware in a private data center, thus offering developers a familiar RDS Functionality available on VMware in a private data center or at the Edge.
  • Virtualization on 64-bit ARM for Edge – VMware demonstrated ESXi on 64-bit ARM running on a windmill farm at the Edge.

Links:


VMworld 2018 US – ITQ Blogs 

Here is a list of ITQ blogs with additional VMworld 2018 US content:


VMworld 2018 US – Keynotes

There are already some recordings available of the keynotes. These can be found on YouTube with the following links:


VMworld 2018 US – Recordings

Just like every year, William Lam from the website virtuallyGhetto creates a GIT repository with all the VMworld sessions. For each session, a recording and presentation are provided. It will probably be a couple of days till weeks until all sessions become available.

VMware Product Vulnerability (CVE-2017-5638)

A security vulnerability has been discovered in some VMware products (CVE-2017-5638). It’s a critical vulnerability which allows remote code execution (RCE) on Apache Struts 2.

The vulnerability affects the following VMware products:
– DaaS 6.X / 7.X
– Hyperic 5.X
– vCenter 5.5 / 6.0 / 6.5
– vROPS 6.X

Read more

PowerCLI Datastore Selection without Storage DRS (SDRS)

When deploying some virtual machines in a test environment I ran into the following problem. In most cases, I make use of a VMware vCenter Storage DRS cluster, in this case when deploying a virtual machine the best-suited datastore is selected for the virtual machines. The only problem is not all customers are entitled to use Storage DRS, because Storage DRS requires a vSphere Enterprise Plus license.

So I needed to create a workaround to select a datastore with enough space. The default PowerCLI behavior is selecting the first datastore detected on a alphabetic order.

So when you are deploying let’s say twenty virtual machines all those virtual machines will be put on the first datastore, so that isn’t going to work well in most cases.


PowerCLI Code

To solve the problem I created the following PowerCLI code. The code selects a cluster and lists all the datastore available. The datastore with the most space available is selected for the virtual machine that is being deployed.

In the PowerCLI code, I just create a very simple virtual machine but you probably get the point. The magic is the $DS line that selects the datastore.

Requirements:

The PowerShell code is tested with the following VMware software components on Microsoft Windows:

  • PowerCLI 6.5 Update 1
  • VMware vCenter Server 6.0
### Variables
$CLUSTER = "Production"       # A Cluster Name
$FOLDER = "Deployed VMs"      # A Virtual Machine folder name located in the vCenter inventory

### Select datastores available and sort them on free space (select the one with most space free)
$DS = Get-Cluster -Name $CLUSTER | Get-Datastore | Select Name, FreeSpaceGB | Sort-Object FreeSpaceGB -Descending | Select -first 1

### Create a virtual machine called VM01
New-VM -Name VM01 -ResourcePool $CLUSTER -Datastore $DS.Name -Location $FOLDER -MemoryGB 1 -CD -DiskGB 5

Article update:

  • 2018-07-30 – Added feature image.
  • 2018-11-17 – Updated article to support the new standards of the website.