Tag: vCenter

VMware vCenter SNMP Configuration

VMware vSphere 6.7 Logo

In this last blog of the year, we are going to set up the SNMP agent on VMware vCenter Server. This blog will cover the vCenter SNMP configuration and I will show some debugging examples to verify the working of the SNMP Agent. In my case, I am using Zabbix Server as the monitoring program to verify the status of my VMware vCenter Server in my lab environments. This reduces the amount of manual troubleshooting and ensures that services are running as expected.

The reason why I did this write-up was because of the lack of documentation from the vendor’s website. As you can see in the source pages below there is a limited set of commands and nearly no examples. To set up my environment I needed some additional commands to get everything working correctly.

Environment

The environment where I configured the SNMP agent was on a VMware vCenter Server 6.7 update 3 (VCSA /appliance). I am monitoring the VMware vCenter Server with a Zabbix Server that is running on CentOS 8. I am currently using SNMP v2 in this example because it is used by most people.

Keep in mind: SNMP v1 and v3 are also supported by both products. My recommendation is to use SNMP v3 of course because of the security improvements like authentication & encryption :).

SNMP

A quick explanation about SNMP (thanks Wikipedia): Simple Network Management Protocol (SNMP) is an Internet Standard protocol for collecting and organizing information about managed devices on IP networks and for modifying that information to change device behavior. Devices that typically support SNMP include cable modems, routers, switches, servers, workstations, printers, and more.

SNMP is widely used in network management for network monitoring. SNMP exposes management data in the form of variables on the managed systems organized in a management information base (MIB) which describes the system status and configuration. These variables can then be remotely queried (and, in some circumstances, manipulated) by managing applications.

Commands

Here are the commands I have used for the vCenter SNMP configuration. Note: make sure you have access to the root account to perform the login.

# Step 1: Start an SSH connection with the vCenter Server (use Putty or something equivalent).

# Step 2: Login as the root user

# Step 3: After a successful login you should be in the appliance Shell.

# Step 4: View the current configuration for SNMP
snmp.get

# Step 5: Configure the SNMP Community (in this example I use MySnmpCommunity)
snmp.set --communities MySnmpCommunity

# Step 6: Allow a device to access the SNMP agent (192.168.10.10 = monitoring server)
snmp.set --targets 192.168.10.10@161/MySnmpCommunity,172.0.0.1@161/MySnmpCommunity,localhost@161/MySnmpCommunity

# Step 7: Enable the SNMP Agent
snmp.enable

# Step 7: Verify the SNMP Settings configured
snmp.get

# Step 8: Test the working (in my case it never works... not sure why? Has something to do with my access restrictions?)
snmp.test

# Step 9: Perform a test from the monitoring server (in my case a Linux machine with snmpwalk)
snmpwalk -v2c -c MySnmpCommunity %hostname-vcenter%

Screenshots

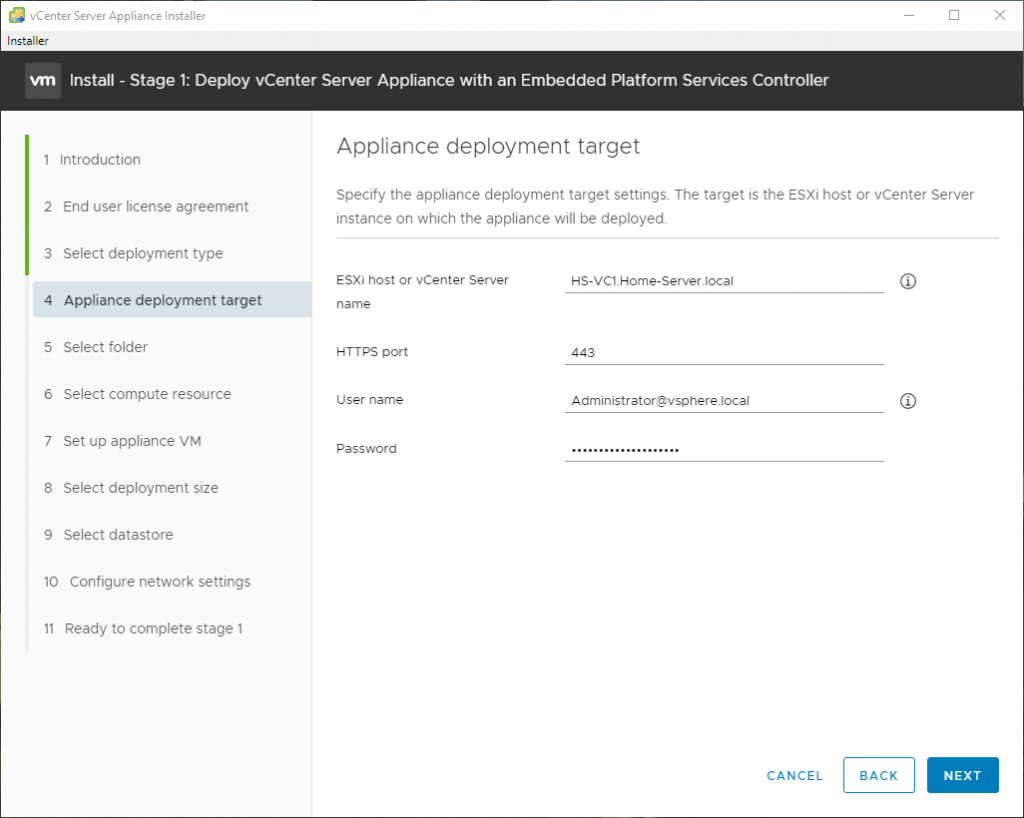
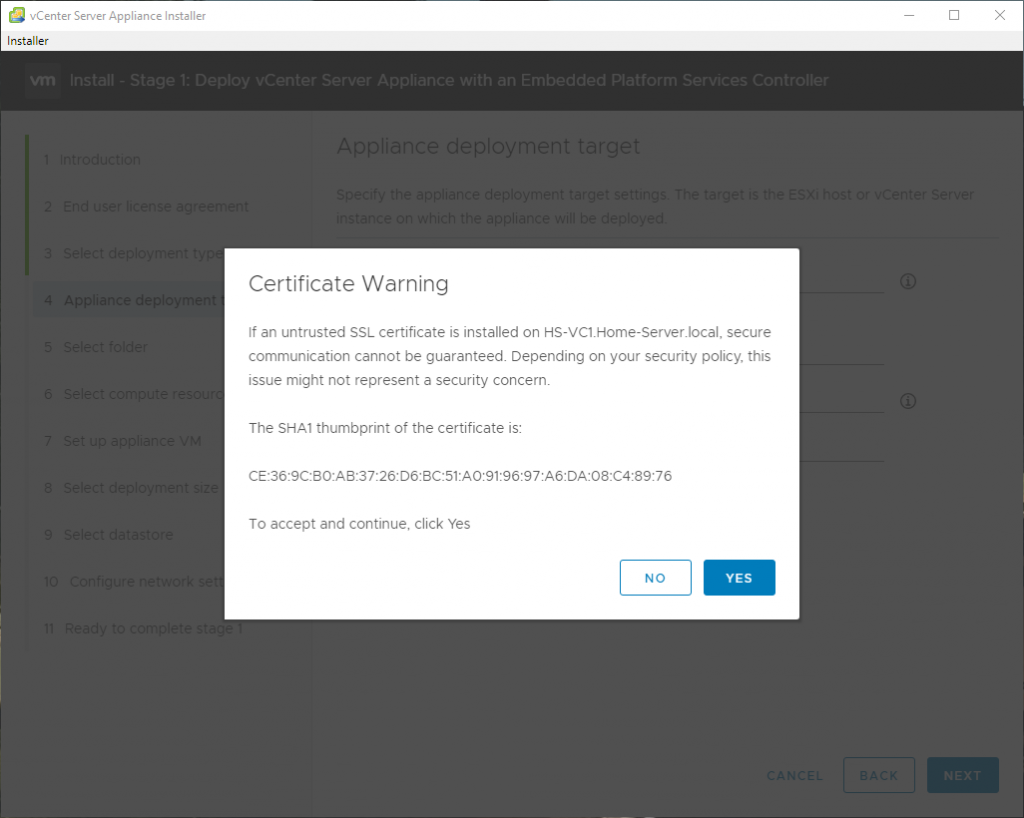
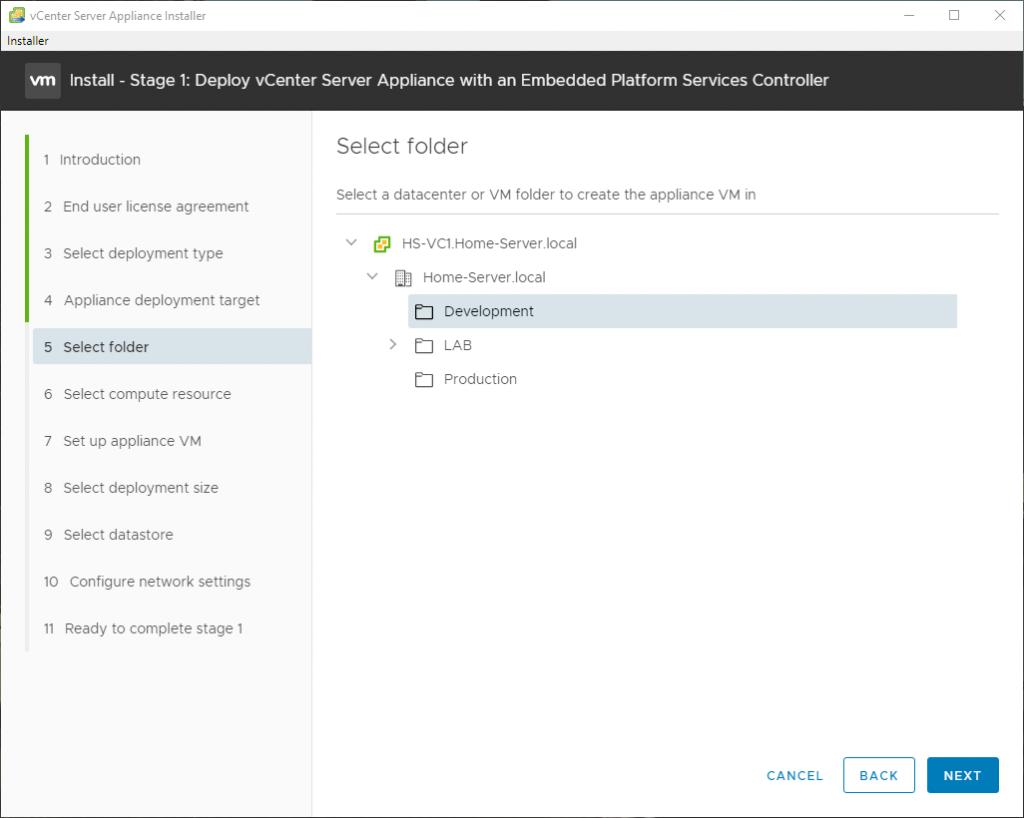
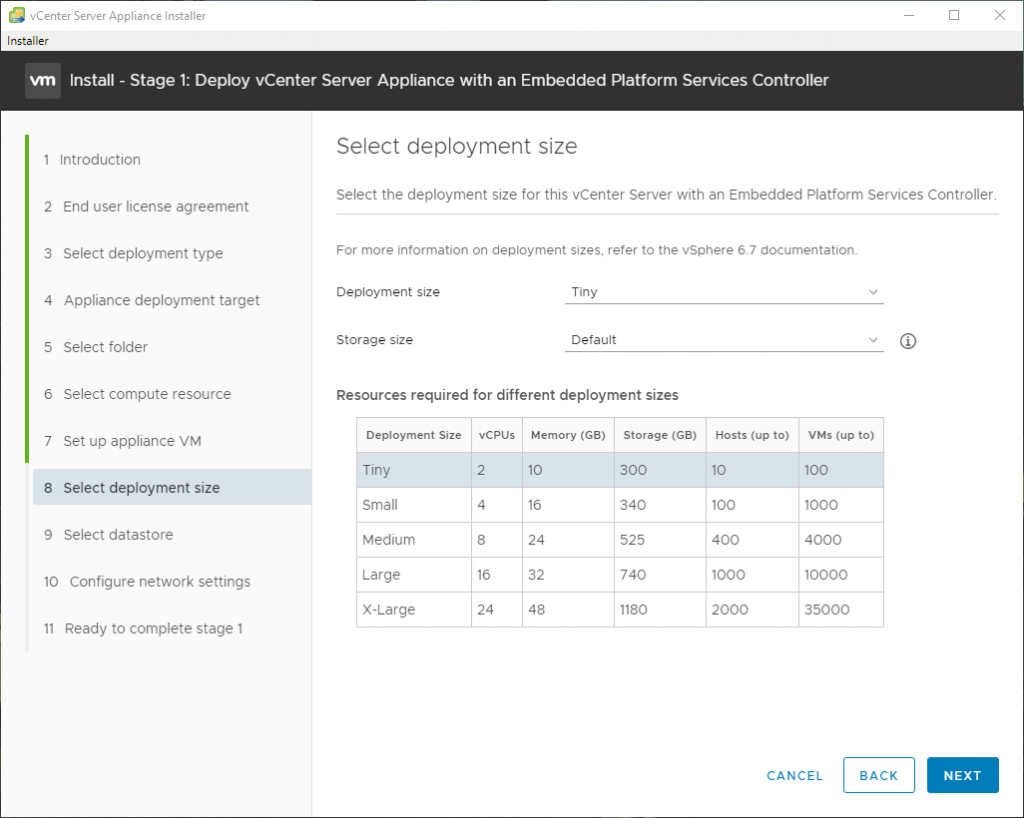
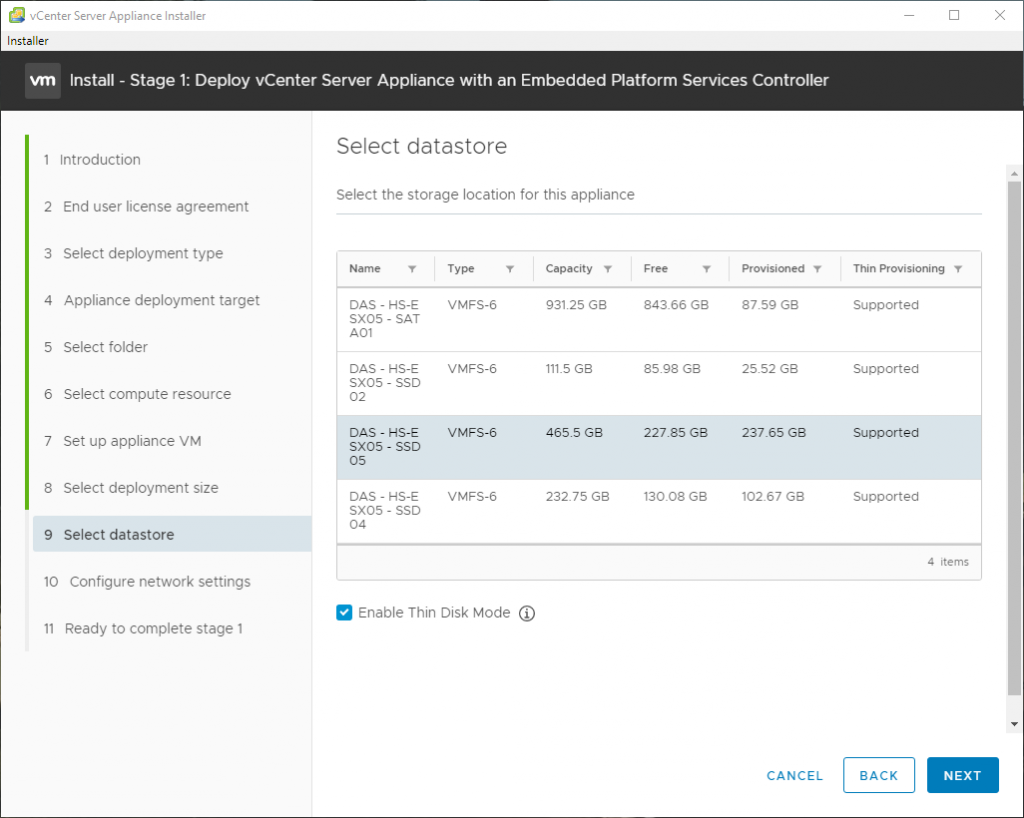
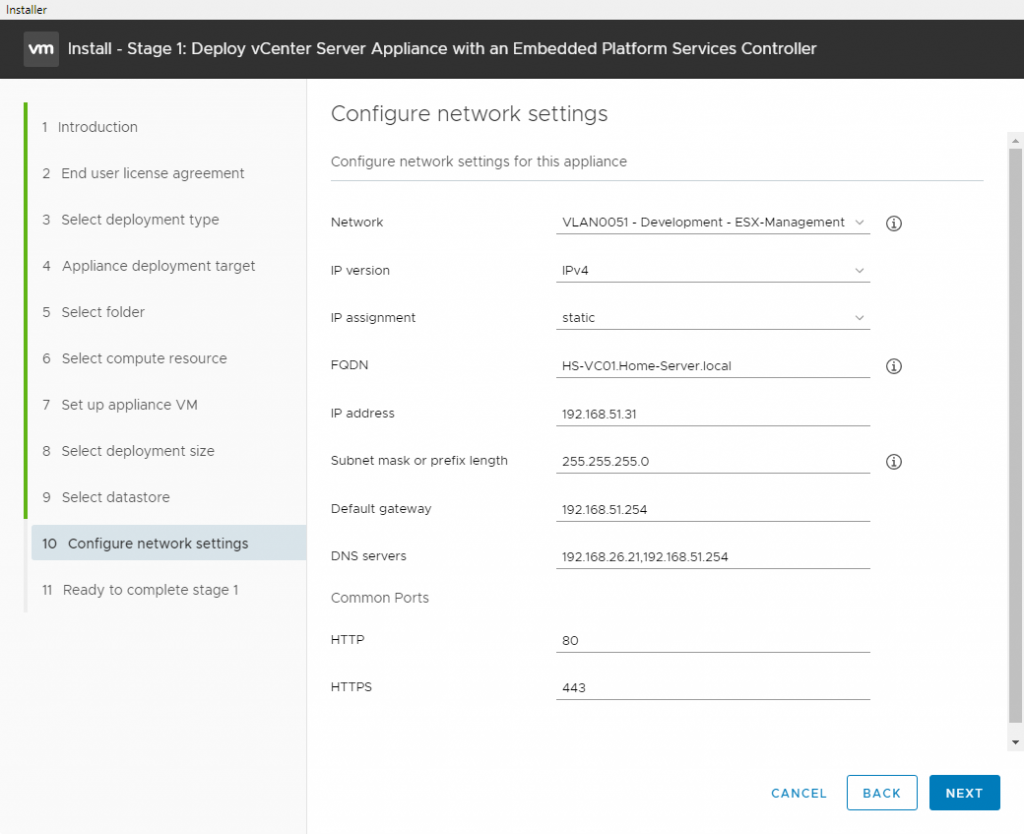
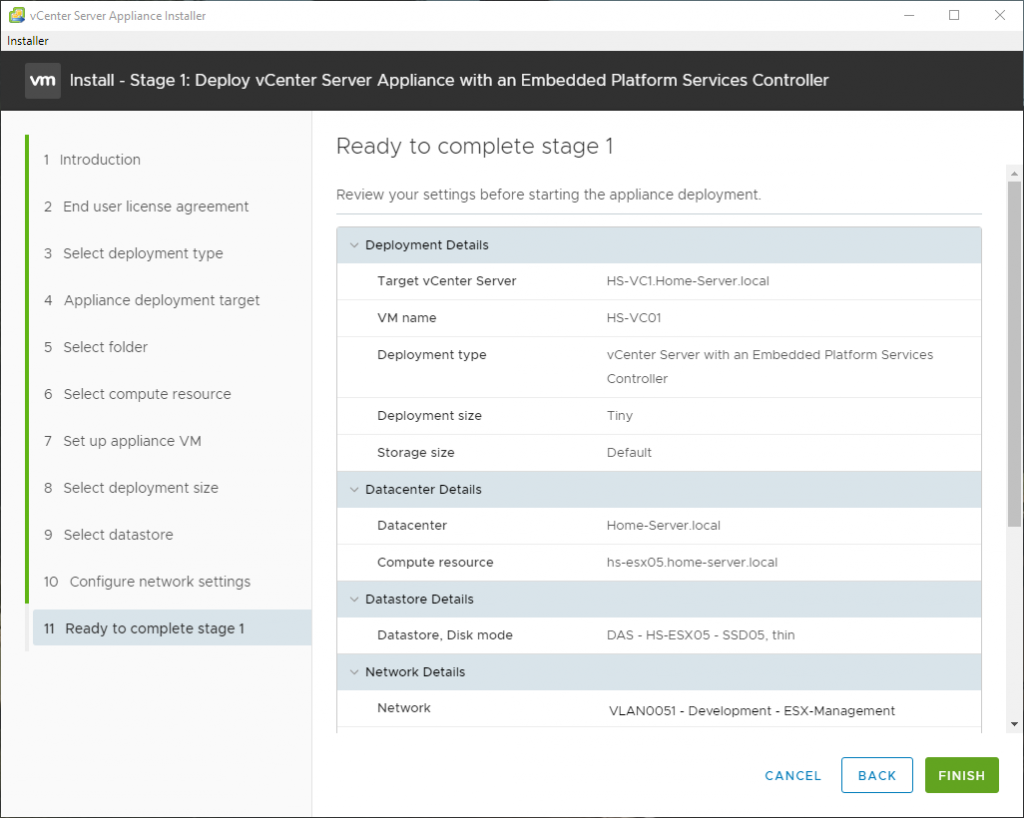
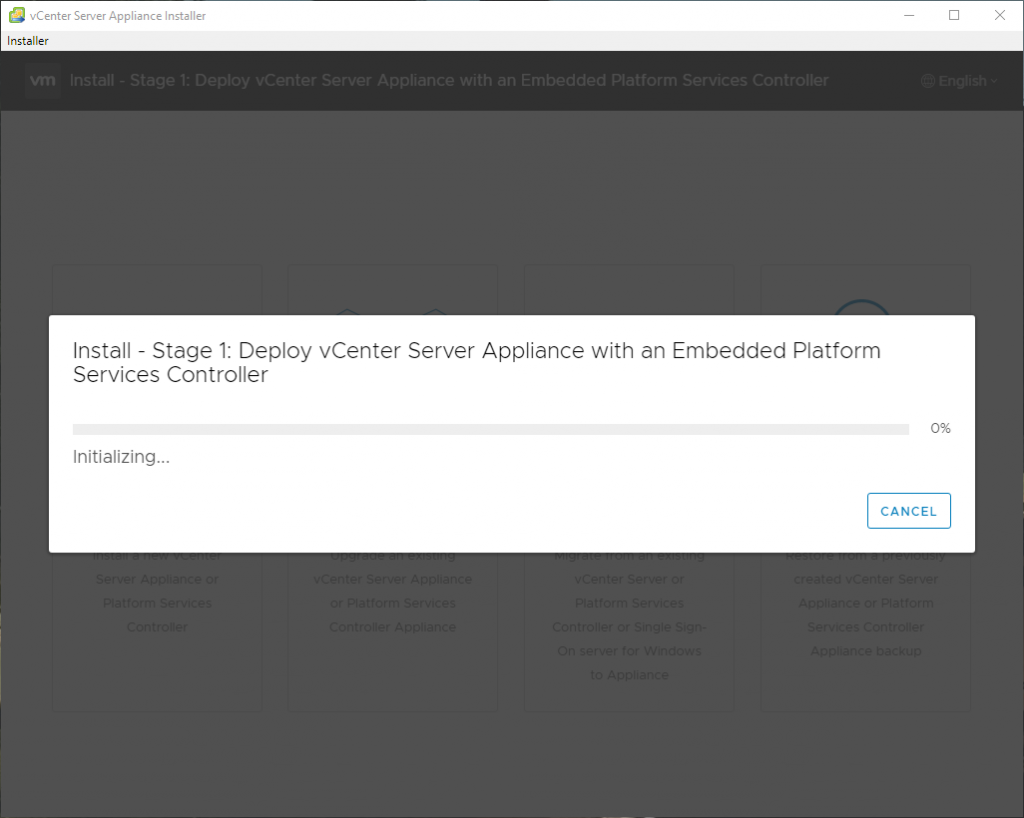
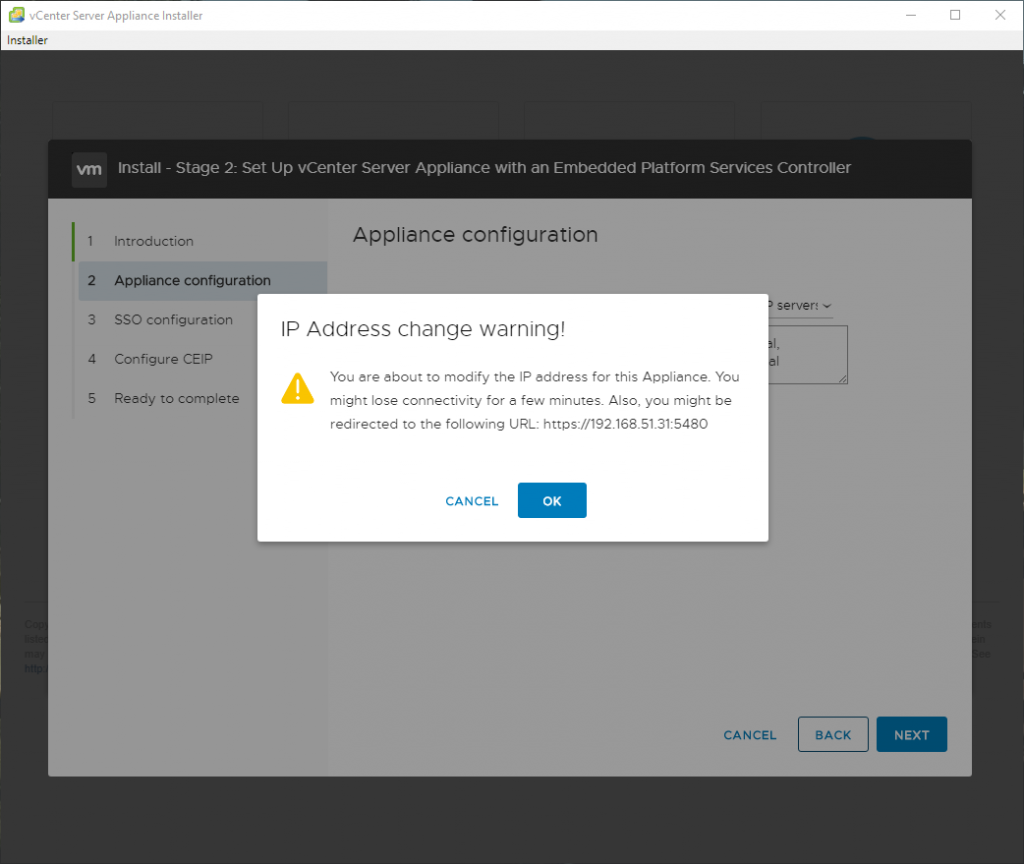
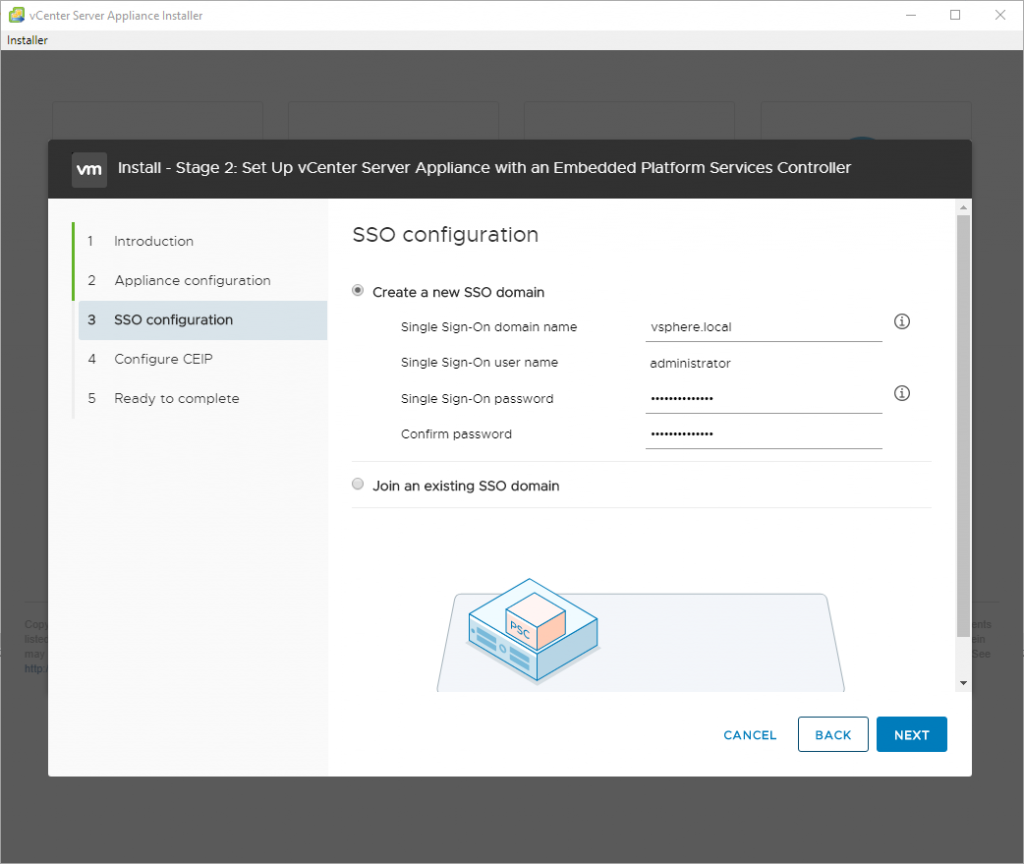
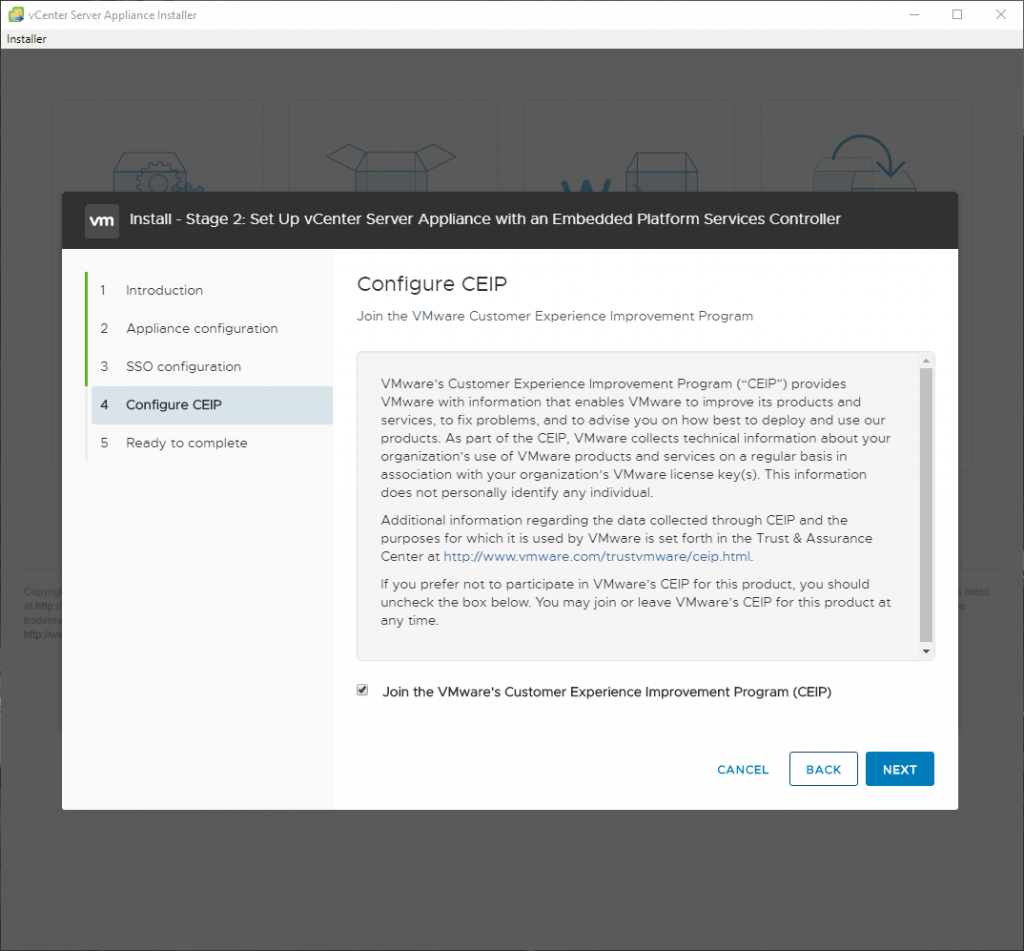
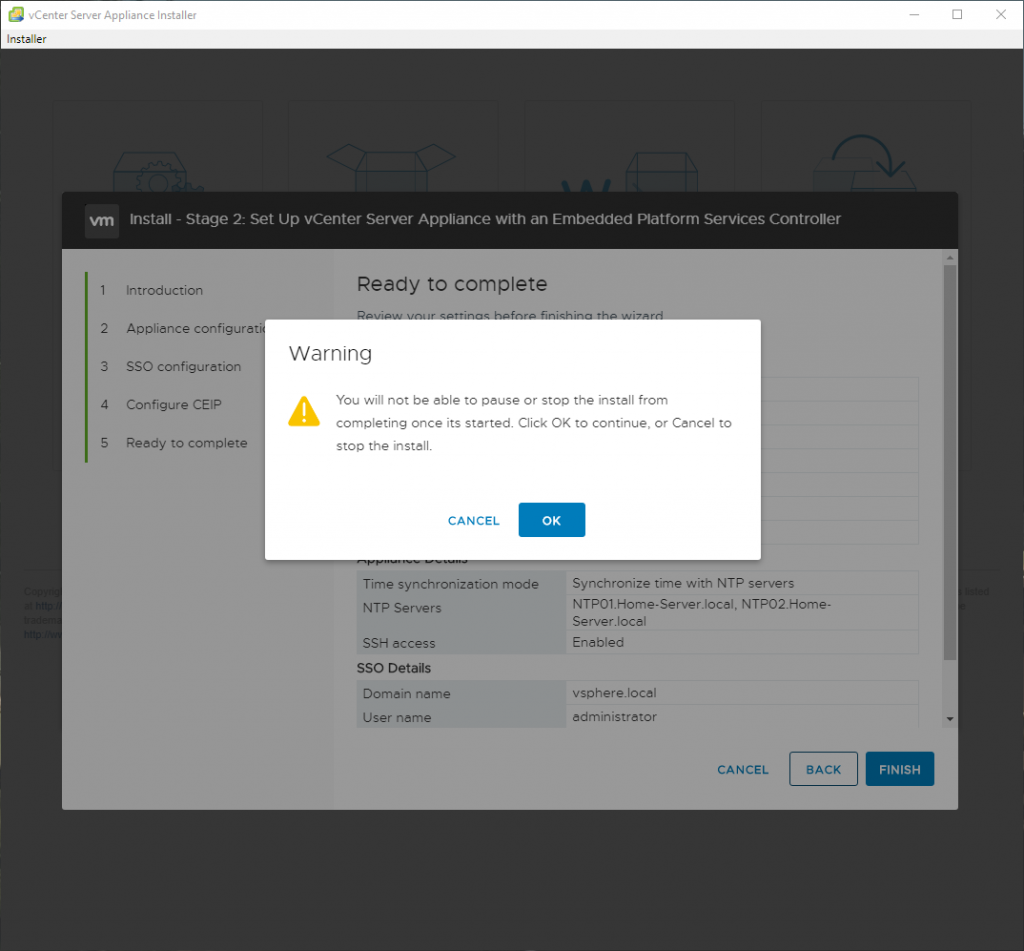
Here are some screenshots related to the SNMP configuration:

Wrap-up

So that is it! Hopefully, this blog post was useful and this wraps-up 2020. See you next year and if you have any comments please respond below.

Sources

Here are some sources I used when configuring SNMP on VMware vCenter Server:

VCSA 6.7 Out of Space (SEAT)

Today I was greeted by the following error message when logging into the VMware vCenter Server also known as VCSA: “Could not connect to one or more vCenter Server systems: https://%fqdn%:443/sdk“. So it was time for a quick write-up on how to resolve this issue.

The issues were already present a couple of hours earlier based on monitoring and logging. For example, Veeam Backup & Replication tried to perform a backup but failed because there were no vSphere Tags available. Veeam Backup & Replication generated the following message “Tag Backup SLA – Bronze is unavailable, VMs residing on it will be skipped from processing.“.

I’m running a VMware vCenter Server as in a VCSA 6.7 appliance and it has an embedded Platform Services Controller. The exact version of the appliance was at the moment of the issue “6.7.0.32000 – Build 14070457“.

Could not connect to one or more vCenter Server systems:

At first glance everything looks fine, the web-interfaces are online, authentication is working but after login, the following message appears “Could not connect to one or more vCenter Server systems: https://%fqdn%:443/sdk“. None of the pages are displaying any content. Here is a screenshot:


After performing a simple reboot nothing had happened, the result was the same. So it was time to dig deeper. Luckily the reboot did trigger a new event in the Appliance Management Page (5480). It appeared that the /storage/seat disk had filled up. The alert that popped-up was “File system /storage/seat is low on database storage space. Increase the size of disk /storage/seat or decrease the data retention.” Here is a screenshot:


Increasing Disk Space

After finding the error message it appeared to be an easy fix. Here is an overview of the commands I used. The commands are also usable for expanding one of the other VCSA virtual disks.

Keep in mind: before increasing disk capacity make sure you have a backup or snapshot available.

It this case we are going to expand this /storage/seat volume. The seat volume is responsible for Stats, Events, Alarms, and Tasks (SEAT) for VMware Postgres (Database).

# Step 01: Connect with the vCenter Server with an SSH Session (use for example Putty).

# Step 02: Login with the root account (root/your-password).

# Step 03: Enable the shell
shell

# Step 04: Run the command to verify the current disk space:
df -h

# Step 05: Increase disk capacity with the Host Client because the vCenter Web-interface is not working ;) (see screenshots)

# Step 06: Run the disk expansion command, the expected output should be: VC_CFG_RESULT=0
vpxd_servicecfg storage lvm autogrow

# Step 07: Verify the disk again, the disk should be bigger!
df -h

# Step 08: Reboot the VCSA
reboot

# Step 09: Verify the working of the VCSA Appliance after reboot.

Here is a collection of screenshots of me performing the procedure.

Conclusion

VMware made it easy for the system administrators to identify the issue and quickly expand the virtual disk from the vCenter Appliance. This is a huge improvement compared to the past. The only thing you need to watch out for is the number of virtual disks connected to the VCSA. If you do not watch out you could expand the wrong disk.

The reason that the disk filled up was caused by two things in my case. 1) I created and destroyed lots of virtual machines in the days before the incident. 2) The VCSA is configured as a tiny footprint so that is why the disks are relatively small.

So this was the write-up! If you got any comments or questions please respond in the section below.

vSphere 6.7 Convergence Tool: Failed to get vecs users and permissions

Last week I was converting a vSphere 6.7 Update 1 environment from external PSC to embedded PSC. After a couple of seconds running the conversion, it ended in an error message (Failed to get vecs users and permissions).

The customer was using the latest available vCenter 6.7 update 1 release available at this point vCenter Appliance 6.7 U1b (11727113). The environment consists of one Platform Services Controller (PSC) and one vCenter Server (VC) and a couple of VMware ESXi 6.7 Update 1 hosts.


Error Message

The error message in my PowerShell window displayed the following error message. Not really the best message (possible resolution is []) but it pointed me in the right direction.

### PowerShell output from vcsa-util.exe
2019-05-07 11:07:58,538 [loggable.py:102]: ================ [FAILED] Task: MonitorPSCDeployTask: Running MonitorPSCDeployTask execution failed at 11:07:58 ================
2019-05-07 11:07:58,553 [loggable.py:102]: Task 'MonitorPSCDeployTask: Running MonitorPSCDeployTask' execution failed because [ERROR: Converge Process Failed!], possible resolution is []
2019-05-07 11:07:58,553 [loggable.py:102]: ================================================================================
2019-05-07 11:07:58,631 [taskflow.py:943]: <MonitorPSCDeployTask - com.vmware.vcsa.installer.converge.monitor_psc_deploy(FAILED)> in <ConvergeTaskFlow - converge(FAILED)> status changed to: FAILED
2019-05-07 11:07:58,694 [taskflow.py:641]: Execution attempt 1 for Task <MonitorPSCDeployTask - com.vmware.vcsa.installer.converge.monitor_psc_deploy(FAILED)> FAILED with exception: ERROR: Converge Process Failed!
2019-05-07 11:07:58,694 [taskflow.py:672]: Finished executing <MonitorPSCDeployTask - com.vmware.vcsa.installer.converge.monitor_psc_deploy(FAILED)> and its status is FAILED
2019-05-07 11:07:58,694 [taskflow.py:675]: <ConvergeTaskFlow - converge(FAILED)> overall status is now FAILED

Inside the “converge_mgmt.log” logfile the following error was displayed see output below. The log file can be found on the following location on your local system: “C:\Users\User\AppData\Local\Temp\vcsaCliInstaller-2019-05-07-11-25-6pn5b67r\workflow_1557228307149\converge\converge_mgmt.log“. Keep in mind, the file path is dynamic and I was using Microsoft Windows.

2019-05-07T11:07:46.688Z ERROR converge Failed to get vecs users and permissions. Error: {
    "componentKey": null,
    "problemId": null,
    "detail": [
        {
            "id": "install.ciscommon.command.errinvoke",
            "localized": "An error occurred while invoking external command : 'Command: ['/usr/lib/vmware-vmafd/bin/vecs-cli', 'entry', 'getcert', '--store', 'APPLMGMT_PASSWORD', '--alias', 'location_password_default', '--output', '/root/velma/old_certs/APPLMGMT_PASSWORD.crt']\nStderr: Error: No certificates were found for entry [location_password_default] of type [Secret Key].\nvecs-cli failed. Error 87: Operation failed with error ERROR_INVALID_PARAMETER (87) \n'",
            "translatable": "An error occurred while invoking external command : '%(0)s'",
            "args": [
                "Command: ['/usr/lib/vmware-vmafd/bin/vecs-cli', 'entry', 'getcert', '--store', 'APPLMGMT_PASSWORD', '--alias', 'location_password_default', '--output', '/root/velma/old_certs/APPLMGMT_PASSWORD.crt']\nStderr: Error: No certificates were found for entry [location_password_default] of type [Secret Key].\nvecs-cli failed. Error 87: Operation failed with error ERROR_INVALID_PARAMETER (87) \n"
            ]
        }
    ],
    "resolution": null
}
2019-05-07T11:07:46.706Z INFO converge Cleanup successful with partial flag = True.


Solving the issue

After searching on Google on the string “ERROR converge Failed to get vecs users and permissions“. I got a hit on a VMware KB article. The VMware article can be found below and explained what was going wrong.

The solution is very simple… remove the vCenter Backup Schedule in the VAMI (VMware Appliance Management Interface):

Procedure:

  1. Log into the vCenter Server Appliance Management Interface (https://%vcenter-fqdn%:5480)
  2. Login with the root account.
  3. Navigate to the Backup view
  4. Next to Backup Schedule, click the Delete button to delete the current backup schedule
  5. Attempt the convergence process again!
  6. Once the convergence is complete, re-create the backup schedule. See Schedule a File-Based Backup for more information on creating a backup schedule.

Community Feedback

I got the following feedback on this article after publishing:

  • Update 08-04-2019: David Stamen reached out to me on Twitter with the response: This was fixed in #vSphere67U2.

Sources

The following websites were very usefull for troubleshooting this issue:

vSAN: PBM error occurred during PreCloneCheckCallback

Lately, I encountered some issues related to VMware vSAN in my Lab environment. The error message that was popping up all the time was “PBM error occurred during PreCloneCheckCallback“.

So how did the problem occur? First, we start with some background information. My Lab environment is powered-on when needed and powered-off when not needed. This is, of course, a little bit different than a production 24×7 environment that you have in your datacenters worldwide.

The environment was booted successfully at first glance. We are talking about Domain Controllers, vCenter Server, VMware NSX-V, nested ESXi Hosts, and vRealize Automation. When I started deploying virtual machines with a vRealize Automation (vRA) based on blueprints with vSphere Templates issues started to occur.

vRealize Automation was failing on the provisioning task and was cleaning up the deployment because of the failed state (default behavior). So it was time to dig into the underlying infrastructure.

Environment

When the issue occurred the following software versions were used in my lab environment:

  • VMware vCenter 6.5 Update 2B
  • VMware vRealize Automation 7.3.1
  • VMware ESXi 6.5 Update 2
  • VMware vSAN 6.6

Error message(s)

Here is all the information that can be found in various locations surrounding the issue. Lets start with the screenshots. The first one is from VMware vCenter and the second one is from vRealize Automation. As you can see there is clearly a problem.

And here is an overview of the error message(s). Here is the vRealize Automation log entry related to the VMware vSAN issue:

Error in Execute DynamicOps.Common.Client.HtmlResponseException: Service Unavailable (503)

Here is the VMware vCenter log entry related to the VMware vSAN issue:

A general system error occurred - PBM error occurred during PreCloneCheckCallback (2118557)

Solution

The solution is quick but is more like a quick fix because it comes back every time I re-start my lab environment (cold boot).

Procedure:

  • Open a web browser.
  • Navigate to your vCenter Server URL (https://%vc%/vsphere-client).
  • Login with a user that has administrator credentials (administrator@vsphere.local).
  • Navigate to Hosts & Clusters > Select the vCenter Object.
  • Click on the Configure tab.
  • Click on the Storage Providers.
  • Click on the following two buttons:
    • Synchronizes all Storage Providers with the current state of the environment.
    • Rescan the storage provider for new storage systems and storage capabilities.
  • After pressing the buttons, you don’t see any tasks running on the vCenter Server (expected behavior). After 5 seconds everything should be working and provisioning should be possible.

Wrap-up

Thanks for reading this blog post. If you have any comments, please respond in the comment section below!

Deployment of VMware vCenter Server 6.7 Update 1

In this blog post, we are going to deploy VMware vCenter 6.7 Update 1 in my Lab environment. The deployment is fully covered with all the additional notes required to perform a successful installation, migration or upgrade. I also added some guidelines for designing your environment.

Now that vSphere 6.7 Update 1 is available since the announcement on VMworld 2018 US, it is a good time to start looking at vSphere 6.7 instead of vSphere 6.5.

Why should you look at vSphere 6.7 you might ask? vSphere 6.5 is still running like a charm! Yes you are correct but… there are a couple of items to consider:

If you are familiar with the VMware vCenter 6.5 graphical deployment it has been improved in VMware vCenter 6.7. In the past it was a web-based wizard, with 6.7 it is a binary executable. This means a lot faster and better-responding interface and it removes the browser dependency and browser plug-in on your workstation.


Checklist

The checklist items can be verified, days or hours before the initial deployment. If you don’t have a plan before installing, migrating or upgrading things will turn out ugly…

With the checklist, you can determine if your environment is ready for vSphere 6.7 Update 1. It’s about checking and validation your current software and hardware and talking to your vendors about compatibility.

I have also added some design decision ideas. Because you can choose to install, upgrade or migrate without looking at your current architecture but maybe it is time to update your current architecture (design).

  • Make sure that all connected/used VMware products are compatible like (vRealize Automation / vRealize Orchestrator / vRealize Operations Manager / VMware Horizon and the list goes on). This can be verified on the VMware Product Interoperability Matrices page.
  • Make sure that all third-party products are compatible like (Backup & Replication software / Storage vendor software).
  • Determine the correct sizing for your environment. How many virtual machines and ESXi Hosts are going to be running underneath this vCenter Server. These figures determine your vCenter Server size.
  • An embedded Platform Services Controller (PSC) is the way to go in the future. An external Platform Services Controller will not be available anymore in the future.
  • Where is Windows? Please read this article from more than one year ago. Please do not deploy a vCenter Server on Windows. This is a thing of the past.
  • Verify the Hardware Requirements for the vCenter Appliance (depending on your chosen size and internal or external PSC).
  • Do you deploy against an ESXi Host or a vCenter Server?
  • Is your ESXi host hardware compatible with vSphere 6.7 Update 1?

Preparation

The checklist is completed and you have determined that everything is working or is acceptable to continue. Let’s start with some basic stuff that is required:

  • Read the release notes (VMware vCenter Server 6.7 Update 1 Release Notes).
  • Download the latest release from the VMware website.
  • Create firewall rules for your new vCenter Server.
  • Create forward and reverse DNS records in your DNS Server.
  • Register your IP information in your IPAM system.
  • Save your passwords in your Password Management system (Appliance password / SSO password).
  • Have a workstation ready to perform the deployment with sufficient network access and administrative rights.

Deployment

Let’s start the deployment of VMware vCenter 6.7 Update 1. I have chosen for a clean installation of VMware vCenter 6.7 Update 1. I have chosen for an embedded Platform Services Controller (PSC). Based on my total amount of virtual machines and ESXi Hosts I have selected a “Small” installation footprint.

The new deployment process for vCenter Server 6.7 Update 1 consists out of two stages, one is the deployment stage and one is the setup stage.

The first part is mainly responsible for delivering the full appliance with the operation system, network settings, and installation application bundles. The second part is configuring the applications that are running on the vCenter Server. A total installation takes about 45 minutes to complete.

Procedure:

  1. Mount the vCenter Server media (iso file).
  2. Navigate to the following path “X:\vcsa-ui-installer\win32\” (X stands for the CD-ROM drive label).
  3. Run the following application “installer.exe“.
  4. Follow the wizard, I have uploadedall screenshots for reference.

Stage 01 – Deployment

Here are the images of the first stage of the deployment of VMware vCenter 6.7 Update 1. I have no issues to report everything was working fine on the first try!

Stage 02 – Setup

Here are the images of the second stage of the deployment of VMware vCenter 6.7 Update 1. This part was also bug-free, so it was a good deployment.


Configuration

After a successful deployment of the VCSA appliance, you need to configure at least some items to get vCenter Server production ready. The items listed below are a basic set of the most common items I see in the field:

  • Install the vCenter Server License.
  • Active Directory.
  • Assign rights & permissions.
  • Generate and installation of SSL Certificates.
  • Connect the required VMware products and third-party systems.
  • Create a datacenter object.
  • Create a cluster object.
  • Create a distributed switch.
  • Join ESXi Hosts to the newly created cluster.

Lab Environment

So how does my Lab environment look like?

  • VMware vCenter 6.5.0 Update 2. The target for the vCenter 6.7.0 Update 1 deployment.
  • VMware ESXi 6.5.0 Update 2 in the 24×7 environment. Known as the production cluster.
  • VMware ESXi 6.5.0 Update 2 in the Lab environment. Known as the lab cluster.

You might ask… why don’t you upgrade the current vCenter Server? Good question! The machine has been converted/upgraded multiple times. It started out in life as a VMware vCenter 5.5 machine, that was on the Windows Server 2012 platform. So it was a good moment to start clean after this many years.

Cannot Remove Content Library in VCSA 6.5 Update 1

Opening vSphere Web Client (Flash) on Windows Server 2016

The VM Remote Console changed to VMware Workstation instead of VMRC

Lately, I discovered an annoying feature in combination with VMware vCenter and VMware Workstation. When installing VMware Workstation on your management computer it becomes the default Remote Console viewer. To be honest, I like the VMware Remote Console (VMRC) very much. The application has all the features and is quick and light. This is compared to starting VMware Workstation to open a Remote Console.

What is VMware Remote Console: “The VMware Remote Console (VMRC) is a standalone console application for Windows. VMware Remote Console provides console access and client device connection to VMs on a remote host. You will need to download this installer before you can launch the external VMRC application directly from a VMware vSphere or vRealize Automation web client.”

In October 2017, I already fixed my problem on my management computer… but after a recent VMware Workstation update, it changed the Remote Console back to VMware Workstation. Currently, there is no option in the GUI to change the default Remote Console. Ok, but how do we get VMRC back?

When I was comparing the Windows Registry, I discovered that the following registry keys were different between machines. To speed up to process I created some PowerShell one-liners to fix the problem.

### View settings in registry
Get-Item "HKLM:\SOFTWARE\Classes\vmrc\DefaultIcon"
Get-Item "HKLM:\SOFTWARE\Classes\vmrc\shell\open\command"

### Change settings to VMRC
Set-Item HKLM:\SOFTWARE\Classes\vmrc\DefaultIcon -Value '"C:\Program Files (x86)\VMware\VMware Remote Console\vmrc.exe",0'
Set-Item HKLM:\SOFTWARE\Classes\vmrc\shell\open\command -Value '"C:\Program Files (x86)\VMware\VMware Remote Console\vmrc.exe" "%1"'

When you change the registry keys, the settings are direct in effect. No Operating System reboot or browser restart is required. The change is instant. I hope the blog post helps some vSphere Administrators that also prefer VMRC above VMware Workstation for viewing Remote Consoles.

@VMware: I would like to have an option to control the behavior without changing registry keys by hand… 🙂 Thanks!

Environment

The issues occurred with the following combination of software:

  • VMware vCenter Server 6.5 (Update 1e)
  • VMware VMRC (10.0.2-7096020)
  • VMware Workstation (12.5.9 build-7535481)
  • Management Workstation: Windows 10 X64

VMRC Screenshots

Here are some screenshots that display the changes when opening the Remote Console of a Virtual Machine in VMware vCenter.

Article updates:

  • 2019-11-25: Image updates to support new layout changes.
  • 2020-10-30: Fixed code block after WP updates
  • 2022-08-15: Fixed layout issue after WP updates

VMware vSphere 6.5 General Availability

vSphere 6.5 - Logo

VMware vSphere 6.5 is General Available (GA) so this means it is available for download on the VMware website!

For those who like to try out vSphere 6.5. The download mirrors are listed below.

It might be a good idea to wait a couple of months or even until vSphere 6.5 Update 1 is released to put into production.

For those who are interested. In vSphere 6.5 the following features are now available. Keep in mind there are a lot of more items new or changed in this release. I just listed the most interesting:

  • VMware vCenter Appliance Enhancements:
    • Migration Tool
    • Improved appliance management
    • Native high availability
    • Native backup and restore
    • New API Explorer
  • VMware vCenter Administrative Interfaces:
    • vSphere Web Client enhancements
    • vSphere Web Client integration with vSphere Update Manager
    • vSphere Web Client integration with Host Profiles
    • vSphere Web Client integration with Auto Deploy
    • vSphere Client is onboard (HTML5)
  • vSphere 6.5 – Availability Enhancements
    • Proactive HA
    • VMware vSphere High Availability Orchestrated Restart
    • vSphere HA Admission Control Improvements
    • vSphere HA Support for NVIDIA GRID vGPU Configured VMs
  • vSphere 6.5 – Fault Tolerance Enhancements
    • Improved integration with vSphere DRS
    • Reduced network latency
    • Support for multiple port groups
  • vSphere 6.5 – Storage Enhancements
    • Advanced Format Drives and 512e Mode
    • Automated UNMAP
    • LUN Scalability (maximum number of LUNs to 256 and paths to 1,024)
    • NFS 4.1 Support
    • Software iSCSI Static Routing Support
  • vSphere 6.5 – Network Enhancements
    • Dedicated Gateways for VMkernel Network Adapter
    • SR-IOV Provisioning
  • vSphere 6.5 – Security
    • Virtual Machine Encryption
    • Encrypted vMotion
    • Secure boot support
    • Enhanced logging

vSphere 6.5 Announcement

The official announcement can be found on the following page (Link: VMware Announces General Availability of vSphere 6.5). The complete overview can be found in the VMware White Paper – vSphere 6.5 – What’s New PDF file.

vSphere 6.5 Download

Here are the download locations on the VMware.com website.