Tag: Synology

Synology DS218+ Memory Upgrade

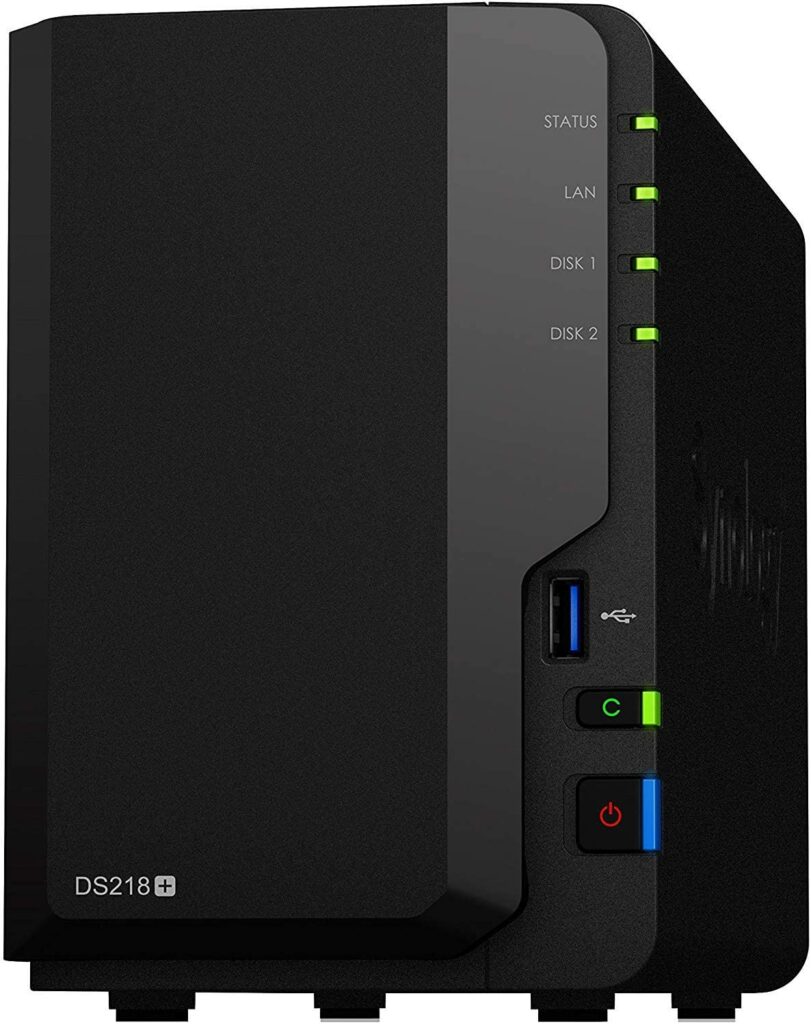
Synology DS218+

In the blog post, we are going to work on a Synology DS218+ Memory Upgrade. By default, there is 2GB of memory installed but you are able to upgrade the memory to more!

So why do I need more memory? I am currently using the Synology package called Cloud Sync to back up my data to Amazon AWS S3. Based on my monitoring information about the Synology DS218+ it is having issues with its amount of memory installed by default. Sometimes the device becomes completely unreachable for a couple of seconds/minutes because of the load that is generated by the backup that is running and that is of course less than ideal.

So it was time to figure out what was possible with the Synology DS218+, I have created a simple overview based on the information from the vendor his website and added some community feedback:

ItemSpecification
Vendor:Synology
Model:DS218+
Out of the box memory size:2GB
Maximum memory size:6GB
Maximum memory size (unofficially):8GB+

Note: Yes I have read about people that are actually running with more memory than 8GB. In my opinion, you need a use case for that and that is not something I have for this device.

Memory module

So there are multiple ways to deal with the Synology DS218+ memory upgrade:

  • Option 01: Just add a 4 GB module to memory slot 2 > Results in 6GB running on two different vendors
  • Option 02: Remove the 2GB module and only install the 4GB module > Results in 4GB running with one single module
  • Option 03: Removing the original module in slot 1 and installing in slot 1 and slot 2 a new module > Results in 8GB running on one vendor.

Another option is to install original modules from Synology, but those modules are in the country where I live in about 80% more expensive. So based on that information I was not an economical option in my opinion for just adding 4GB of memory in 2021 :|. Keep in mind the road I took is officially not supported by Synology also the memory module triggers are warning after every startup of the device that the memory that is installed is not verified/supported.

I ended up with option 01 and if that would not work I would go for option 02. So I bought the following memory module on Amazon, based on the Kingston memory configurator page to identify the correct memory for your device:

  • Vendor: Kingston
  • Type: HyperX Impact 1866 MHz 4GB
  • Artikel number: HX318LS11IB/4
  • Costs including shipping: € 27,50

Installation & Result

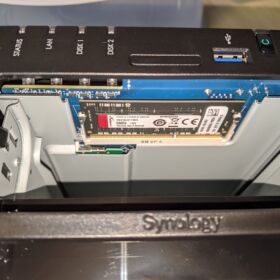
After the memory module was delivered it was time to start the installation. To put it into perspective it is really a walk in the park. You do not need any screwdrivers are other components if you are installing or removing a module in slot number 2!

Side note: If you want to remove the memory module in slot 1 that is a whole other story… there is some information floating around on the internet but that is the other side of the spectrum. It means completely removing the motherboard etc. Here is a great YouTube video on that.

Memory installation – procedure:

  1. Power off the device.
  2. Remove the connected cables like UTP and power.
  3. Put the Synology on your desk.
  4. Remove the hard drive that is nearest to the front panel LEDs and power button.
  5. Look into the device and you will see an empty memory slot.
  6. Place your newly bought memory module into the slot.
  7. Put back the removed hard drive.
  8. Connect the cables back up.
  9. Power on the device.
  10. The boot will take additional time because of a memory validation that is running (took about 15 minutes extra).
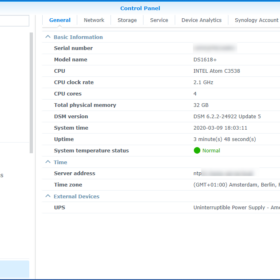
  11. The device will finally be available and verify the DSM information page.

Wrap-up

So that was my blog post about the Synology DS218+ memory upgrade. I have been running the current setup since October 2020 and I can tell you it is completely stable. You can see the uptime in the Synology DSM screenshot 82 days and counting.

If you got additional questions or remarks please respond in the comment section below. Thanks for reading my blog post and see you next time.
Synology DS1618+ Homelab Review

This blog post is about replacing my Synology DS1515+ with a Synology DS1618+. I was forced to replace my Synology DS1515+ because it fell victim to the Intel Atom bug twice. The Synology is used for my primary storage in my VMware Home Lab.

This blog post is a bit later than expected to be honest… I already swapped out the Synology NAS about eleven months ago! So this is going to be a review based on my eleven-months experience and so information about why I bought the DS1618+ as a replacement.

Synology DS1515+ Atom Bug

In about six months two Synology DS1515+ past away in my Home Lab because of a hardware issue. One day they are working as they should and the next day you come home and they are dead. No lights, no sound, nothing is working “Bricked”.

The Synology DS1515+ is not a bad device… but it is using the Intel Atom C2000 CPU that is notorious for failing because it has an internal fault.

To get it clear it is not the fault of Synology… A lot of other vendors are also dealing with the Intel Atom C2000 fall out. Like Asrock, Cisco, HP, Netgear, Supermicro, and this list goes on. Here is an article from The Register with some more information surrounding this topic.

That is enough about the old let’s move on to the new!

Synology DS1618+ Setup

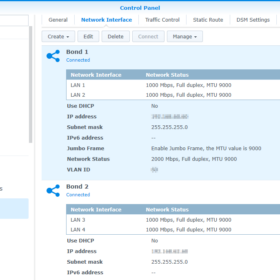
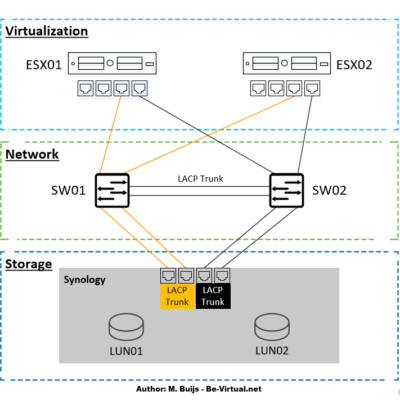
Here is an overview of the current Synology DS1618+ setup in my Home Lab environment. I have created two LACP bonds to load balancing iSCSI traffic from VMware ESXi on two dedicated VLANs.

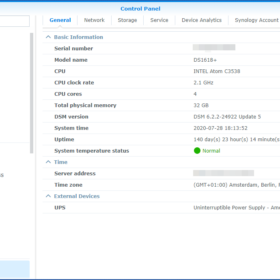
  • Synology DS1618+ (default 4 GB memory/upgraded to 32 GB)
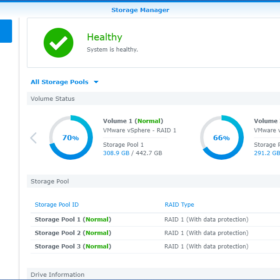
  • Storage pool 1: 2x Samsung EVO 850 500 GB – RAID 1
  • Storage pool 2: 2x Samsung EVO 860 500 GB – RAID 1
  • Storage pool 3: 2x Samsung EVO 860 500 GB – RAID 1
  • Network: 2x 1 Gbit LACP and 2x 1 Gbit LACP

All three storage pools represent a VMware Datastore and are made available with iSCSI to the VMware Hosts.

Here is an image that illustrates the current storage setup of my Home Lab environment. Nothing too fancy, all ports in the illustration are 1 Gbit.

Performance

Let’s start by looking at the Synology DS1618+ performance! An important aspect in my environment, it is not the size that matters but the speed!

Network

I have moved my SSD drives from the Synology DS1515+ to the Synology DS1618+ and the performance is identical… Say what? This is because the are limited to the same issue! Both devices are running against the network bandwidth limitation.

Both devices are out of the box delivered with 4x 1 Gbit network interfaces which can be easily matched by the three storage pools that I have installed.

Luckily the DS1618+ has an expansion slot, this is something the DS1515+ does not have! You can install a 10 Gbit network card which will improve the bandwidth drastically!

Memory

Already the memory issues/limitations in another blog post. Here is a reference to that blog post on my website.

Power Usage

Like all my Home Lab devices I like to know what the power usage is of each device. Synology indicates the following power consumption values on their website:

Factory measurementsWattage
Power Consumption – HDD Hibernation25.76 Watt
Power Consumption – Access 56.86 Watt

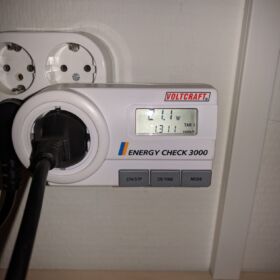
I have tested this with my power meter. In my case, the system was booted up and was supplying two ESXi Host with storage and a total of fourteen active virtual machines. The room temperature was 20 degrees celsius. I personally think 21.1 watts is not bad at all 🙂 surely compared to the DS1515+ that was using 25.3 watts with two drives less!

Tips

Here are some tips I have learned so far about the Synology DS1618+ unit:

  • If you are in need of performance install a 10 Gbit expansion card in the expansion slot of the DS1618+. Surely when using all-flash storage! This will easily outperform the out of the box network cards (4x 1 Gbit).
  • Install as much memory as you can in the device, this will reduce the disk swapping of the Synology OS and increase the performance and stability of the virtual machines running. Here is my blog post about this issue.
  • I have performed some tests with a cache drive that was an SSD device with a storage pool that was also an SSD device this did not improve performance (a maximum of about 5% in total, which is quite low if you ask me). If you are interested in a cache drive look at the NVMe expansion card but beware you only got one slot so… or you go with an NVMe expansion card or 10 Gbit NIC. So choose wisely depending on your requirements.

If you got some additional tips for people who are interested in a DS1618+ please respond below!

Sources

Here are some interesting websites related to the Synology DS1618+:

Synology DS1618+ Memory Expansion

After replacing the Synology DS1515+ with a Synology DS1618+ last year it was time for another investment in the Synology DS1618+. Overall it is a great device that is running my VMware iSCSI storage for my ESXi Hosts but based on some metrics the memory was experiencing some issues, so it was time for a memory expansion!

The reason why I am expanding my memory is physical memory swap usage. Based on my monitoring tooling the system is swapping to disk and when that happens the storage latency is increasing extensively on the iSCSI volumes (2500 ms / 2.5 seconds latency dips). The hypervisor and virtual machine survive but they don’t experience it as a good thing ;).

After a good session with a Synology Engineer on VMworld 2019 Europe, he explained that the storage latency I am experiencing multiple times a day must be caused by the swapping to disk and refreshing the read-cache in the physical memory. Synology is using physical memory as a read cache to boost performance by default.

Synology Statement

Here is the official statement from Synology surrounding performance and memory: “Memory usage remains high because the system stores frequently accessed data in the cache, so the data can be quickly obtained without accessing the hard disk. Cache memory will be released when the overall memory is insufficient. High swap space usage indicates insufficient system memory, and will also affect the system performance. You can view the rate of swap in and swap out by choosing Swap from the drop-down menu on the top.”

To clarify, my Synology DS1618+ is only running iSCSI storage with two volumes with both SSD drives in RAID1. The only services that are enabled are SSH, SNMP and off course iSCSI. The machine has no other purpose!

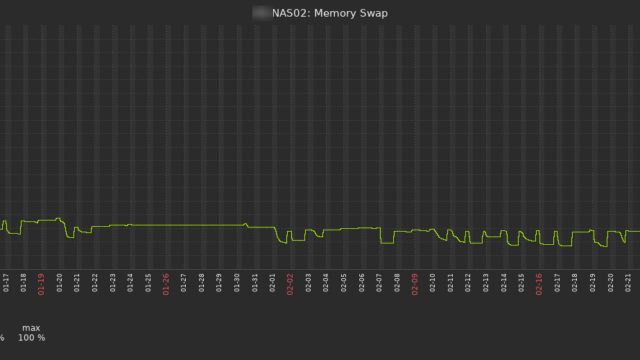
Memory Swap

The metric here is showing the usage of memory swap, the value 100% means it is completely empty, so no swap usage. The value 0% means that all swap is allocated/completely full.

As you can see in the graph there was always some swap activity going on in the last months around 92%. On 03-09-2020 / 03-10-2020 I installed the 32 GB DDR4 memory in the system and it is a steady 100% (so no swap in use).

Memory Expansion

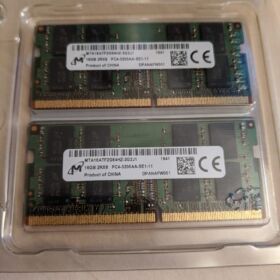
I bought the following kit from Crucial 32GB Kit (2 x 16GB) DDR4-3200 SODIMM with the following part nr “CT2K16G4SFD832A“. This is the suited memory for the DS1618+ as you can verify on the Crucial website. The memory configurator tool can be found over here: Crucial Advisor Tool.

Luckily expanding the memory in a Synology DS1618+ is quite easy! I created a brief write-up and some photos are located below.

Procedure:

  1. Poweroff the VMware workload.
  2. Poweroff the Synology NAS.
  3. Remove the DS1618+ from his rack/shelf.
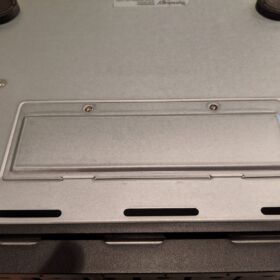
  4. Flip the device, the memory hatch is located on the bottom.
  5. Remove the two screws.
  6. Open the hatch.
  7. Remove the original memory.
  8. Install the new memory.
  9. Close the hatch.
  10. Install the two screws.
  11. Install in the rack.
  12. Power on the system (the first time booting will be longer than normal. The DS1618+ is performing a memory check, in my case, it took about 15 minutes).
  13. Power on workload.

Source

Here is the some additional links surrounding the memory expansion: