Recently I was removing an SD card from one of my lab servers but after removing it, the server kept complaining about it. The HPE ProLiant is equipped with HPE Integrated Lights-Out (iLO). This is an out-of-band management system to manage and configure the server. It also is responsible for monitoring the components inside the server.
This means it also monitors the health state of the SD card that is located on the motherboard slot. So when I removed the SD card it just kept checking the health of the component and causing health alerts.
In this blog post, I going to explain what I did to reset the HPE iLO to stop it from monitoring the SD card after permanent removal.
Environment
Here is a short list of information about the HPE ProLiant system that I used for this blog post:
- Hardware: HPE Proliant DL360e Gen 8
- HPE ilO version: 4
- HPE SD card: HP 32GB SD card / Part nr: 700135-001
- Firmware: HPE iLO version: 2.78
- Software: VMware ESXi 7.0.3
Location – SD Card
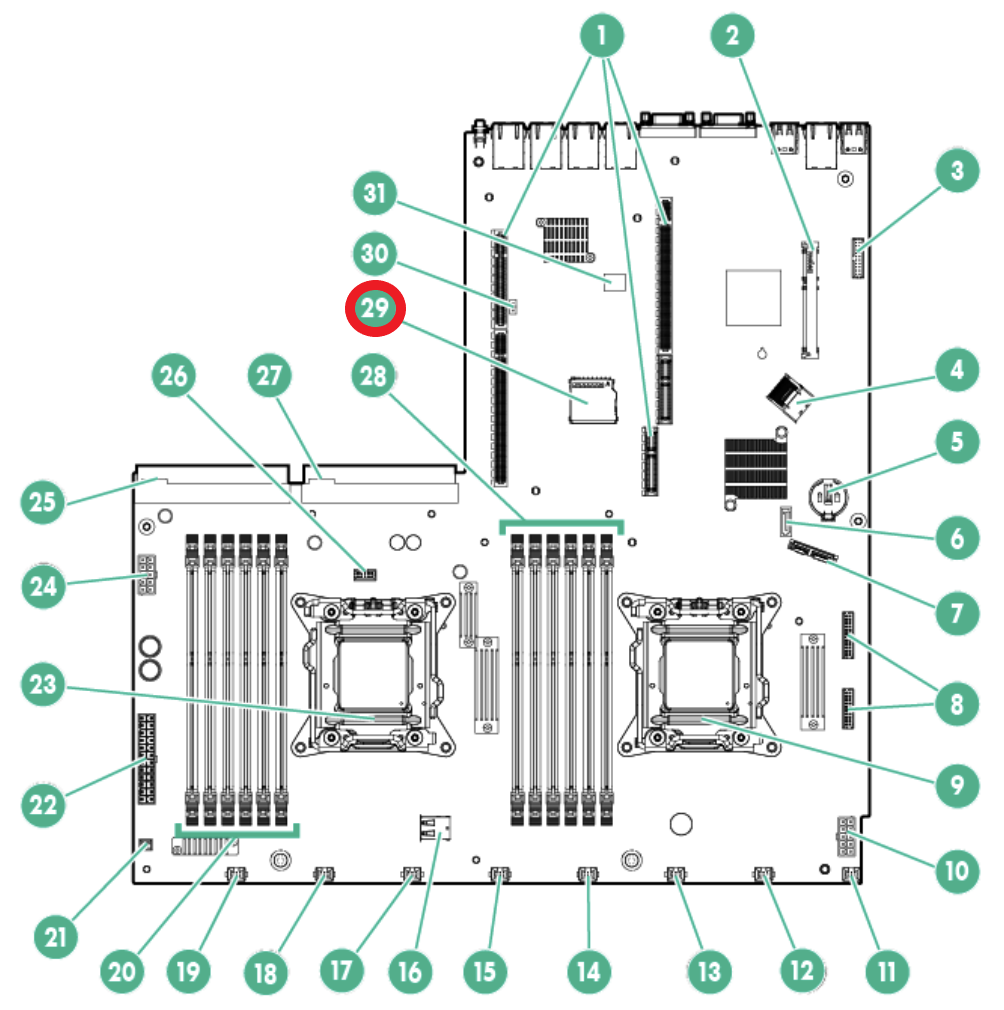
To make the blog post complete I added the motherboard drawing from the HPE manual. The SD card slot is located on the HPE ProLiant DL360e Gen 8 motherboard and the slot is located at number 29 in the drawing below.
Problem – Removing SD card causes degraded state
The issue occurred when the SD card failed. After the SD card failure, I removed the SD card from the system and moved to an SSD-based boot media for VMware ESXi.
I performed some basic troubleshooting like removing the power from the server and restarting the HPE iLO but the health status was still degraded and it was still searching for the SD card.
Here are the error messages in the interface:
- Error message on the login page: iLO Self-Test report a problem with: Embedded Flash/SD-CARD. View details on Diagnostics page.
- Error message on diagnostics: Controller firmware revision 2.10.00 NAND read failure
Here are some screenshots related to the error messages:


Resolving – Resetting the SD card slot
Resolving the issue isn’t partially hard… if you know which buttons to push and in what order ;). Before starting, make sure the SD card is removed from the system and that the iLO has been rebooted.
To make sure that everything just works directly… open a clean browser and login into the iLO and directly follow the procedure described below.


Closing words
In the end, it cost me about three hours to get it fixed. The reason why I wanted it so badly fixed was that it kept triggering my monitoring system and that drove me crazy. This server in particular powers on and powers off regularly and during every power cycle, the health state resets and triggers monitoring alerts.
This wraps up the blog article hopefully it is useful for somebody, please respond below if you have any comments or additional information! See you next time! 🙂


