Tag: Storage

Synology DS1618+ Memory Expansion

After replacing the Synology DS1515+ with a Synology DS1618+ last year it was time for another investment in the Synology DS1618+. Overall it is a great device that is running my VMware iSCSI storage for my ESXi Hosts but based on some metrics the memory was experiencing some issues, so it was time for a memory expansion!

The reason why I am expanding my memory is physical memory swap usage. Based on my monitoring tooling the system is swapping to disk and when that happens the storage latency is increasing extensively on the iSCSI volumes (2500 ms / 2.5 seconds latency dips). The hypervisor and virtual machine survive but they don’t experience it as a good thing ;).

After a good session with a Synology Engineer on VMworld 2019 Europe, he explained that the storage latency I am experiencing multiple times a day must be caused by the swapping to disk and refreshing the read-cache in the physical memory. Synology is using physical memory as a read cache to boost performance by default.

Synology Statement

Here is the official statement from Synology surrounding performance and memory: “Memory usage remains high because the system stores frequently accessed data in the cache, so the data can be quickly obtained without accessing the hard disk. Cache memory will be released when the overall memory is insufficient. High swap space usage indicates insufficient system memory, and will also affect the system performance. You can view the rate of swap in and swap out by choosing Swap from the drop-down menu on the top.”

To clarify, my Synology DS1618+ is only running iSCSI storage with two volumes with both SSD drives in RAID1. The only services that are enabled are SSH, SNMP and off course iSCSI. The machine has no other purpose!

Memory Swap

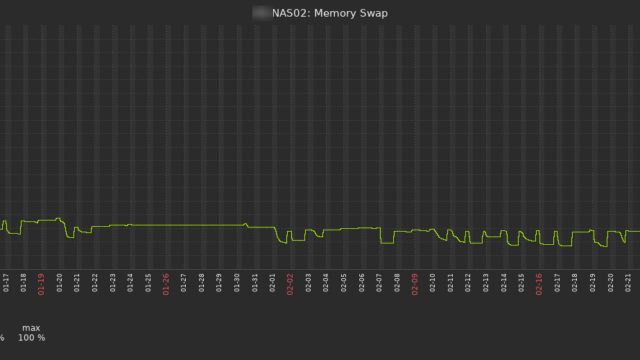
The metric here is showing the usage of memory swap, the value 100% means it is completely empty, so no swap usage. The value 0% means that all swap is allocated/completely full.

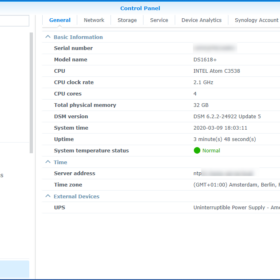
As you can see in the graph there was always some swap activity going on in the last months around 92%. On 03-09-2020 / 03-10-2020 I installed the 32 GB DDR4 memory in the system and it is a steady 100% (so no swap in use).

Memory Expansion

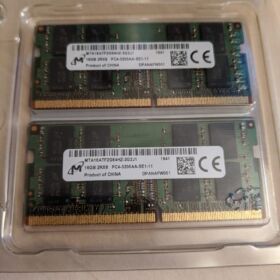
I bought the following kit from Crucial 32GB Kit (2 x 16GB) DDR4-3200 SODIMM with the following part nr “CT2K16G4SFD832A“. This is the suited memory for the DS1618+ as you can verify on the Crucial website. The memory configurator tool can be found over here: Crucial Advisor Tool.

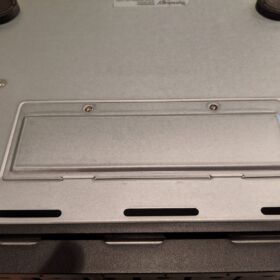
Luckily expanding the memory in a Synology DS1618+ is quite easy! I created a brief write-up and some photos are located below.

Procedure:

  1. Poweroff the VMware workload.
  2. Poweroff the Synology NAS.
  3. Remove the DS1618+ from his rack/shelf.
  4. Flip the device, the memory hatch is located on the bottom.
  5. Remove the two screws.
  6. Open the hatch.
  7. Remove the original memory.
  8. Install the new memory.
  9. Close the hatch.
  10. Install the two screws.
  11. Install in the rack.
  12. Power on the system (the first time booting will be longer than normal. The DS1618+ is performing a memory check, in my case, it took about 15 minutes).
  13. Power on workload.

Source

Here is the some additional links surrounding the memory expansion:
Changing VMware Storage Controller to Paravirtual for CentOS 7

In this post, we are going to change the Virtual Storage Controller from LSI Logic Parallel to VMware Paravirtual for a CentOS 7 based Virtual Machine that is running on VMware vSphere. This blog post will contain step-by-step guidance for performing the operation.

In my case the virtual machine was built in VMware Workstation and after some time migrated to VMware ESXi. The VMware Paravirtual Storage Controller is not supported in VMware Workstation. That is why the virtual machine came over with the “wrong” storage controller.

My 24×7 Lab environment is running shared iSCSI based storage and all virtual machines are thin provisioned. The Virtual Machine that came over from VMware Workstation is installed with CentOS 7.

Why VMware Paravirtual?

Why should you want to migrate from an LSI Logic Parallel to a VMware Paravirtual SCSI Controller? Two simple reasons and they are two good ones:

  • Lower CPU utilization
  • Higher Throughput

Personally, I have a third reason to add… compliance. All my virtual machines should be compliant with the VMware Best Practice and my personal Home Lab standard. In my Lab environment, this means using the VMware Paravirtual where ever possible/supported.

VMware Official Statement 1:

PVSCSI adapters are high-performance storage adapters that can result in greater throughput and lower CPU utilization. PVSCSI adapters are best for environments, especially SAN environments, where hardware or applications drive a very high amount of I/O throughput. The VMware PVSCSI adapter driver is also compatible with the Windows Storport storage driver. PVSCSI adapters are not suitable for DAS environments.VMware Paravirtual SCSI adapters are high-performance storage adapters that can result in greater throughput and lower CPU utilization.

VMware Official Statement 2:

The PVSCSI adapter offers a significant reduction in CPU utilization as well as potentially increased throughput compared to the default virtual storage adapters, and is thus the best choice for environments with very I/O-intensive guest applications.

Procedure

The most important step in the process is to make sure you have a valid backup! After that, it is just following the steps described below:

  • Create a virtual machine snapshot or backup before you begin.
  • Power-off the virtual machine.
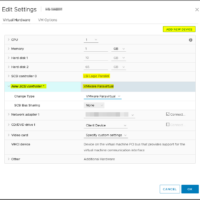
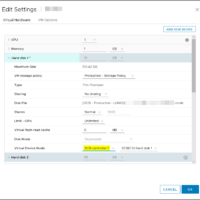
  • Add the VMware Paravirtual Controller to the Virtual Machine. Do not change the disk controller assignment yet, only add the storage controller to the VM (screenshot 01).
  • Power-on the virtual machine.
  • Login with an account on the virtual machine (account must be able to obtain root access).
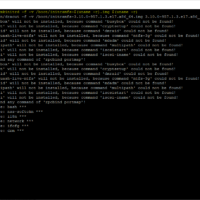
  • Start rebuilding the initial ramdisk image (screenshot 02):
    mkinitrd -f -v /boot/initramfs-$(uname -r).img $(uname -r)
  • Power-off the virtual machine.
  • Assign disks to the new storage controller and remove the old storage controller (screenshot 03).
  • Power-on the virtual machine.
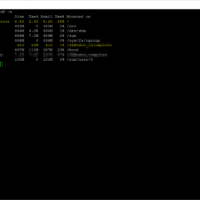
  • Validate that everything is working and disks are mounted (screenshot 04).
  • Remove the virtual machine snapshot or backup after you are done.

Screenshots

Here are some screenshots from the procedure:

Conclusion

At this point, I have swapped out three virtual machines from the LSI controller to the VMware Paravirtual SCSI Controller. The machines have been running now for about two weeks without any problems. So everything is compliant again ;).

If you encounter any problems or have any questions about this subject please feel free to contact me on Twitter or the Reply option below.

Source

Here are some interesting related articles that I used for creating this blog post:

Flashing a HPE MSA 1040 via FTP

In this article, we are going to flash an HPE MSA 1040 via FTP. At work, I faced a problem with a couple of HPE MSA 1040 storage arrays. Three out of ten were not displaying their web interface after about 200 days of uptime. This is not really a known problem for the HPE MSA 1040 :(. So it was time figure out a way to work around it. 

After some time, I noticed there is a built-in FTP flash option. About two hours later I finally got the latest firmware installed.

I have made a write-up to do it yourself. It is not really a difficult procedure but you need a couple of items ready and the correct command to get it all working.


Flashing the HPE MSA 1040

Note: I have tested this procedure on a Windows 10 client. The FTP tool for uploading the firmware is the built-in from Windows.

Prerequisites:

  • Download the firmware from the HPE website.
  • Store the firmware files in the following folder (C:\Temp).
  • Extract the bin file from the downloaded bundle.
  • Make sure no workloads are running on the HPE MSA.

Procedure:

  1. Start an SSH session with an available controller (no preferred choice between controller A & B)
  2. Enable the FTP service on the controller with the command: “set protocols ftp enabled”.
  3. Open a CMD shell (with administrator rights) on your workstation or management server.
  4. Run the following commands:
# Navigate to C:\Temp

# Start FTP session
ftp %IP-Address%

# Login
Username: ftp
Password: !ftp

# Navigate to directory
cd /

# Upload firmware and start flash
put TS252P001.bin flash

# Close FTP session
ftp close

# Go back to the SSH Session and disable the FTP service on the MSA
set protocols ftp disabled

Article update:

  • 2018-03-26 – Added feature image to page.
  • 2018-11-17 – Updated article to support the new standards of the website.