In this blog post, we are going to automate the installation of VMware ESXi 5.5, 6.0 and 6.5. This can be done with a so-called “kickstart” configuration file which is officially supported by VMware. The file contains the configuration for a VMware ESXi Host to configure settings like IP address, subnet mask, hostname, license key, datastore, etc.
The kickstart configuration file can be made available
- FTP
- HTTP/HTTPS
- NFS Share
- USB flash drive
- CD/DVD device
Personally, I prefer to use the HTTP protocol.
Use Case
You might ask yourself, why should I install an ESXi Host with a kickstart file? Some of the use cases I identified over the years are:
- The very first ESXi Hosts for your SDDC environment (before VMware vCenter is deployed or vSphere Auto Deploy is configured).
- A standalone ESXi Host for a small environment.
- A Home Lab environment to install nested VMware ESXi Hosts.
Setup a web server
To make the kickstart configuration file available for the ESXi host we need a web server. Basically, every web server available on the market can serve this file. Here is a list of web server products that I have used: Apache, Microsoft IIS and NGINX.
In this environment/example I used a Microsoft IIS server on a Windows 10 Client. Do not forget to add the cfg extension to the MIME types.
Configuration file
Now it’s time to create a text file with your favourite text editor. The text file in this example is called (ks.cfg). I have added two configuration files as samples, one with the minimum settings and one I normally use for my Lab environment.
Configuration file – Simple (ks.cfg)
This is a default ks.cfg configuration file with just the minimum of settings required.
#
# Sample scripted installation file
#

# Accept the VMware End User License Agreement
vmaccepteula

# Set the root password for the DCUI and Tech Support Mode
rootpw mypassword

# The install media is in the CD-ROM drive
install --firstdisk --overwritevmfs

# Set the network to DHCP on the first network adapter
network --bootproto=dhcp --device=vmnic0

# A sample post-install script
%post --interpreter=python --ignorefailure=true
import time
stampFile = open('/finished.stamp', mode='w')
stampFile.write( time.asctime() )
Configuration file – Advanced (ks.cfg)
This is the more advanced version of the configuration file that also configures a lot of other settings like NTP servers, search domain, CEIP and a static IP address for the management interface.
### ESXi Installation Script
### Hostname: LAB-ESXi01A
### Author: M. Buijs
### Date: 2017-08-11
### Tested with: ESXi 6.0 and ESXi 6.5

##### Stage 01 - Pre installation:

    ### Accept the VMware End User License Agreement
    vmaccepteula

    ### Set the root password for the DCUI and Tech Support Mode
    rootpw VMware1!

    ### The install media (priority: local / remote / USB)
    install --firstdisk=local --overwritevmfs --novmfsondisk

    ### Set the network to DHCP on the first network adapter
    network --bootproto=static --device=vmnic0 --ip=192.168.151.101 --netmask=255.255.255.0 --gateway=192.168.151.254 --nameserver=192.168.126.21,192.168.151.254 --hostname=LAB-ESXi01A.lab.local --addvmportgroup=0

    ### Reboot ESXi Host
    reboot --noeject

##### Stage 02 - Post installation:

    ### Open busybox and launch commands
    %firstboot --interpreter=busybox

    ### Set Search Domain
    esxcli network ip dns search add --domain=lab.local

    ### Add second NIC to vSwitch0
    esxcli network vswitch standard uplink add --uplink-name=vmnic1 --vswitch-name=vSwitch0

    ###  Disable IPv6 support (reboot is required)
    esxcli network ip set --ipv6-enabled=false

    ### Add NTP Server addresses
    echo "server 192.168.126.21" >> /etc/ntp.conf;
    echo "server 192.168.151.254" >> /etc/ntp.conf;

    ### Allow NTP through firewall
    esxcfg-firewall -e ntpClient

    ### Enable NTP autostartup
    /sbin/chkconfig ntpd on;

    ### Rename local datastore (currently disabled because of --novmfsondisk)
    #vim-cmd hostsvc/datastore/rename datastore1 "DAS - $(hostname -s)"

    ### Disable CEIP
    esxcli system settings advanced set -o /UserVars/HostClientCEIPOptIn -i 2

    ### Enable maintaince mode
    esxcli system maintenanceMode set -e true

    ### Reboot
    esxcli system shutdown reboot -d 15 -r "rebooting after ESXi host configuration"
Installing an ESXi Host with Kickstart file
The following procedure needs to be performed to boot from a kickstart file:
- Boot the ESXi host with a VMware ESXi ISO (ISO file can be obtained from the VMware download page).
- Press the key combination “shift + o” at boot.
- Enter one of the following lines after runweasel:
- For an HTTP share: ks=http://%IP_or_FQDN%/kg.cfg
- For an HTTPs share: ks=https://%IP_or_FQDN%/kg.cfg
- For a NFS share: ks=nfs://%IP_or_FQDN%/ks.cfg
- The installation will start and use the kickstart configuration file (ks.cfg).
- After the installation is complete the ESXi Host will reboot.
Screenshots
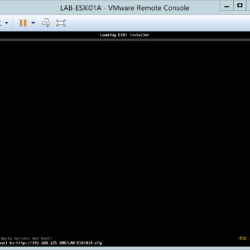
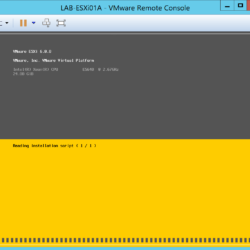
Here are some screenshots of the procedure:
Article updates:
- 2018-10-04 – This article has been updated.
- 2018-11-16 – Code blocks were not displaying correctly.
- 2019-11-25 – Fixed images


I had the same problem. this post give me lots of advise it is very useful for me. You saved my day. Thanks so much!
Hi Mischa, Thanks for this post. I have a few questions.
Can we pass variables to the ks file, so we can leave hostname and ip settings generic? Also how do you point to a different iso in the same directory, think custom hp vmware iso and custom dell vmware iso?
Thank you,
Glenn
Hello Glenn,
Thanks for your reply. Based on your question I’m guessing that you are building some sort of deployment automation script for deploying multiple hosts in your environment?
Question 01: Yes you can use variables in the ks file. Take a look at the following URL: https://www.virtuallyghetto.com/2015/10/how-to-prompt-for-user-input-during-an-interactive-or-scripted-install-of-esxi.html
Question 02: The kickstart file is used after the selection of an ISO file. If you want to create an ISO file with multiple versions you can take a look at the following: https://communities.vmware.com/thread/414371
You can create an isolinux.cfg file with all the versions to select in a menu.
Mischa
Hi Mischa, that is a correct assumption. Thanks for your prompt response and helpful info.
Hi Mischa,
Is there compatibilty issues with the ESXi 6.7 U2 (HPE Customized) ?
From Post installation just ### Set Search Domain commands worked as expected. Rest of script did not work for me.
Stage 02 – Post installation:
### Open busybox and launch commands%firstboot --interpreter=busybox
### Set Search Domain
esxcli network ip dns
Did you receive a error code or message?
Can you share this with me :)?
Thanks for your reply!
Installation just goes from 0/117 without errors and reboots itself after completion. ESXi loads as expected with all values in script but IPv6 stays enabled. After i manually reboot host again to be sure that there is no pending reboot for disabling IPv6 . vmkernel.logs can help to investigate issue ?
Below is the kickstart file:
Write this command after Shift+O ###netdevice=vmnic0 bootproto=dhcp ks=nfs://172.18.18.210/kickstart/emils.cfg
###! Accept the VMware End User License Agreement
vmaccepteula
###! Set the root password for the DCUI and Tech Support Mode
rootpw VMware1!
###!Install on the first local disk available on machine
install –firstdisk –overwritevmfs
###! Set the network to Static and do not create
network –bootproto=static –device=vmnic0 –ip=172.18.18.235 –netmask=255.255.255.0 –gateway=172.18.18.254 –nameserver=192.168.126.21,192.168.151.254 –hostname=ESXv6.o365.az –addvmportgroup=0
###! Reboot ESXi Host
reboot –noeject
Stage 02 – Post installation
###! Open busybox and launch commands
%firstboot –interpreter=busybox
Set Search Domain
esxcli network ip dns search add –domain=o365.az
Disable IPv6 support (reboot is required)
esxcli network ip set –ipv6-enabled=false
P.S
In script i have all # in place, in this example it is just copy paste issue.