Tag: vRealize

Aria Orchestrator – Add CD-ROM to a Virtual Machine

In this blog post, we will add a CD-ROM device to a vSphere Virtual Machine in an automated way. This will be done with vRO (vRealize Orchestrator/Aria Automation Orchestrator). The action is used for creating a CD-ROM drive when provisioning a new machine with vRO.

I am doing this blog post because, after a lot of Googling, I could not find a good example or solution online. So it was time to do a blog post after figuring out what I needed to do!

So let’s start the blog post about adding a CD-ROM to a virtual machine.

vRO – Action Code

Here is the vRealize Orchestrator/Aria Automation Orchestrator code for an action. This action creates the specification for adding a CD-ROM to an already running or a new virtual machine. It’s a lot of code for a “simple” CD-ROM drive because, in the vCenter Server interface, it feels like a couple of easy clicks. In the backend it is another story, see the code below. You need to attach a lot of specifications together to add a CD-ROM to a virtual machine.

Action details:

  • Name: createCdDvdDriveSpecification
  • Version: 1.0.0
  • Description: Create the specification for a vSphere CD/DVD drive to add a CD/DVD drive to a virtual machine with the VMware vCenter SDK.
  • Inputs: None
  • Return Type: Any
  • Location: com.bv.vsphere.vm.spec
// Set variable
var deviceConfigSpecs = new Array();
var deviceConfigSpec;

// Add CD-ROM connect spec
var connectInfo = new VcVirtualDeviceConnectInfo();
    connectInfo.allowGuestControl = true;
    connectInfo.connected = false;
    connectInfo.startConnected = true;

// Add CD-ROM backing spec
var backingInfo = null;
    backingInfo = new VcVirtualCdromRemotePassthroughBackingInfo();
    backingInfo.deviceName = "";

// Add Virtual CD-ROM
var cdrom = new VcVirtualCdrom();
    cdrom.backing = backingInfo;
    cdrom.controllerKey = 200;
    cdrom.key = 0;
    cdrom.unitNumber = 0;
    cdrom.connectable = connectInfo;

// Create CD-ROM configuration spec
var deviceConfigSpec = new VcVirtualDeviceConfigSpec();
    deviceConfigSpec.device = cdrom;
    deviceConfigSpec.operation = VcVirtualDeviceConfigSpecOperation.add;
    deviceConfigSpecs[0] = deviceConfigSpec;

// Troubleshooting generated configuration specification
// System.debug(deviceConfigSpec);

// Return specification
return deviceConfigSpec;

vRO – Workflow

This is a part of a larger workflow but it will help you get started. I have listed the most important parts of creating a virtual machine and how to get started. This code is quite identical to changing a virtual machine to add a CD-ROM drive.

// Load module
var vsphereVmSpec = System.getModule("com.bv.vsphere.vm.spec");

// Set variable
var actionName = arguments.callee.name.substr(6);
var deviceConfigSpecs = [];
var deviceConfigSpec;

// Virtual machine spec
var vmConfigSpec = new VcVirtualMachineConfigSpec();
// Lot more stuff here like VM name, resource pool, host etc

// Add CD-ROM
deviceConfigSpec = vsphereVmSpec.createCdDvdDriveSpecification();
deviceConfigSpecs[ii++] = deviceConfigSpec;

// Combine configuration
vmConfigSpec.deviceChange = deviceConfigSpecs;

// Start Virtual Machine creation
try {
    System.log("[" + actionName + "] Starting Virtual Machine creation (" + virtualMachineName +")");
    task = vmFolder.createVM_Task(vmConfigSpec, vmResourcePool, vmHost);
}
catch (exception) {
    throw "[" + actionName + "] exception";
}

// Return VC:Task
return task;

Wrap-up

So this is my technical blog post about adding a CD-ROM to a virtual machine with vRealize Orchestrator (vRO). Hopefully, it is useful for somebody, please respond below if you have any comments or additional information! See you next time! 🙂
vRealize Orchestrator 8.X Download Hotfix

When running VMware vRealize Orchestrator 8.X at some point in time you need to install a hotfix. When performing this operation at a customer I was running into an issue, I could not find the link on the VMware website in the first place.

After some searching, I found the location so I thought lets write a small blog post about locating the patch files on the VMware website.

Keep in mind: this blog post is focused on a standalone vRealize Orchestrator instance that requires a hotfix bundle. This is not for the embedded version inside vRealize Automation (vRA).

Download location

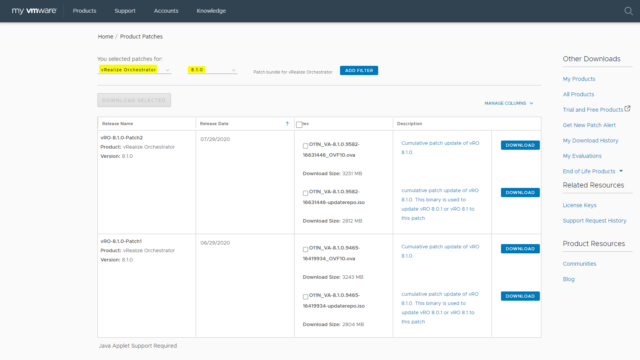
At first, we need to go to the appropriate location on the VMware website. This update and the latest patched installation files are in my opinion not easy to find. Because you would expect the files to be on the VMware Download page. So where do we need to go?!

Here is a short write-up:

  1. Go to the following URL for the vRealize Orchestrator 8.X downloads.
  2. Log in with your My VMware account.
  3. Select the vRealize Orchestrator product and the appropriate version.
  4. On this page, you will found OVA versions and iso version of the latest vRO hotfixes.

Note:

  • *.OVA = is required for installing a new vRealize Orchestrator instance.
  • *.ISO = is required for patching a currently running vRealize Orchestrator instance.

vRealize Orchestrator Install Hotfix

Here is a short description of how to install a vRealize Orchestrator 8.X hotfix. Keep in mind when writing this blog post vRealize Orchestrator 8.2 did not have a hotfix yet! So far I figured out a difference between the releases:

  • vRealize Orchestrator 8.0 & 8.1 still have a VAMI
  • vRealize Orchestrator 8.2 does not have a VAMI.

So after vRealize Orchestrator 8.2, the upgrade procedure will be slightly different!

Installation Procedure

Before starting the upgrade always make sure you have a backup!

  1. Mount the ISO file to the vRO virtual machine.
  2. Log in to the vRealize Orchestrator VAMI with the root account.
  3. Click on the Update tab.
  4. Modify the download mirror to the CD-ROM drive.
  5. Check for updates
  6. Install the updates.
  7. Wait some time to let the upgrade complete and that should be it!

Wrap-up

This was my short blog post about updating vRealize Orchestrator 8 with a Hotfix. If you have any comments please respond below :)!

vRealize Automation 7 – Creating Business Groups Automatically

In the blog post were are going to automatically create Business Groups in vRealize Automation 7.X. This can be handy when a customer has a lot of Business Groups and adds additional Business Groups overtime. So it was time to write a little bit of code that makes my life easier.

I wrote it in the first place for using it in my lab environment to set up vRealize Automation 7.X quickly for testing deployments and validating use cases.

Advantages of orchestrating this task:

  • Quicker
  • Consistent
  • History and settings are recorded in vRealize Orchestrator (vRO)

Environment

My environment where I am testing this vRO workflow is my Home Lab. At home, I have a Lab environment for testing and developing stuff. The only products you need for this workflow are:

  • vRealize Automation 7.6 in short vRA.
  • vRealize Orchestrator 7.6 in short vRO.

Note: The vRealize Automation endpoint must be registered to make it work.

vRealize Orchestrator Code

Here is all the information you need for creating the vRealize Orchestrator workflow:

  • Workflow Name: vRA 7.X – Create Business Group
  • Version: 1.0
  • Description: Creating a vRealize Automation 7.X Business Group in an automated way.
  • Inputs:
    • host (vCACCAFE:VCACHost)
    • name (string)
    • adname (string)
  • Outputs:
    • None
  • Presentation:
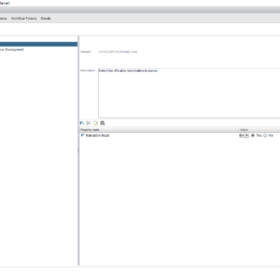
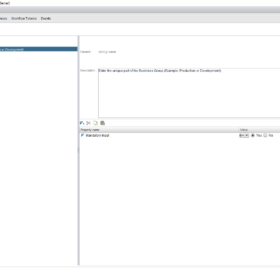
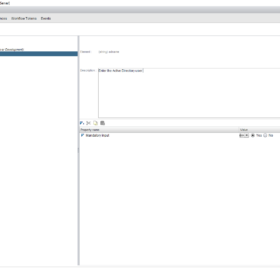
    • See the screenshots below.

Here is the vRealize Orchestrator code in the Scriptable Task:

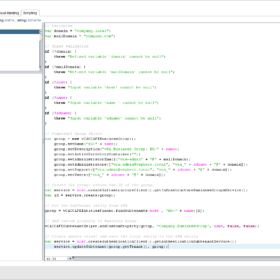
// Variables
var domain = "company.local";
var mailDomain = "company.com";

// Input validation
if (!domain) {
	throw "Defined variable 'domain' cannot be null";
}
if (!mailDomain) {
	throw "Defined variable 'mailDomain' cannot be null";
}
if (!host) {
	throw "Input variable 'host' cannot be null";
}
if (!name) {
	throw "Input variable 'name ' cannot be null";
}
if (!adname) {
	throw "Input variable 'adname' cannot be null";
}

// Construct Group Object
var group = new vCACCAFEBusinessGroup();
	group.setName("BG-" + name);
	group.setDescription("vRA Business Group: BG-" + name);
	group.setActiveDirectoryContainer("");
	group.setAdministratorEmail("vra-admin" + "@" + mailDomain);
	group.setAdministrators(["vra-admin@vsphere.local", "vra_" + adname + "@" + domain]);
	group.setSupport(["vra-admin@vsphere.local", "vra_" + adname + "@" + domain]);
	group.setUsers(["vra_" + adname + "@" + domain]);

// Create the group; return the ID of the group.
var service = host.createInfrastructureClient().getInfrastructureBusinessGroupsService();
var id = service.create(group);

// Get the SubTenant entity from vRA
group = vCACCAFEEntitiesFinder.findSubtenants(host , "BG-" + name)[0];

// Add custom property to Business Group
vCACCAFESubtenantHelper.addCustomProperty(group, "Company.BusinessGroup", name, false, false);

// Create update client and save the local entity to the vRA entity
var service = host.createAuthenticationClient().getAuthenticationSubtenantService();
	service.updateSubtenant(group.getTenant(), group);

Screenshots

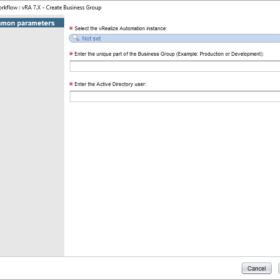
Here are some screenshot(s) of the Workflow configuration that helps you set up the workflow as I have done!

Wrap-up

This is a vRealize Orchestrator workflow example that I use in my home lab. It creates vRealize Automation Business Groups to improve consistency and speed.

Keep in mind: Every lab and customer is different. In this workflow I use for example the prefix BG- for Business Groups. What I am trying to say is modify it in a way that is bested suited for your environment.

Thanks for reading and if you have comments please respond below.