In my home lab environment, I wanted to rebuild my VyOS virtual router/firewall. So I exported the configuration from the old appliance and I tried to perform a restore on the new virtual appliance. The question that arose was: how do you perform a VyOS configuration restore?
Somehow on the internet, I could not find any tutorial or manual that explained to me how this action could be performed. There are enough write-ups and articles surrounding the TFTP, FTP and SCP restore procedure but the VyOS appliance is empty… with a default configuration. I just wanted to restore the configuration without setting up all kinds of services and configuring by hand my interfaces on the VyOS appliance.
So it was time to examine the VyOS appliance and figure out what was going on under the covers.
Why do you need VyOS?
Before diving any
So why do you need OSPF and BGP at home? I’m a VMware Consultant that is responsible for SDDC / SDN / NSX designs and implementations. I regularly need to perform tests in my Lab environment. VMware NSX likes to have a dynamic routing protocol to connect the virtual overlay network to the physical world. Both routing protocols can be used to perform this. An article about a detailed configuration can be found here at Jeffrey Kusters his blog (my ITQ colleague). I not going into further detail on VMware NSX, this blog post is focused on VyOS.
VyOS Virtual Hardware
My VyOS appliance is deployed on a VMware vSphere 6.5 infrastructure. I used the OVA file that is available on the VyOS website (vyos-1.1.8-amd64.ova). The virtual machine is called the “LAB-FW01” this hostname will appear in the video record. The YouTube video is listed below.
The Virtual Machine hardware is configured as default. I only assigned the virtual network cards to the right networks.
- Public – Network adapter 1 – Connected to a WAN interface
- Private – Network adapter 2 – Connected to a VLAN trunk
VyOS Configuration Restore
Now it is time for restoring the VyOS configuration file on a newly deployed VyOS appliance.
Preparation:
- Deploy a new VyOS appliance and make sure that the virtual networks are connected to the correct adapter.
- Verify and/or change the MAC addresses were needed. The MAC addresses should align between the configuration file and the new virtual appliance:
- Option 01: Change the virtual network card MAC address to the ones that were used on the old appliance.
- Option 02: Change the MAC addresses in the configuration file that is used for the restore. The MAC address should align with the newly deployed VyOS appliance.
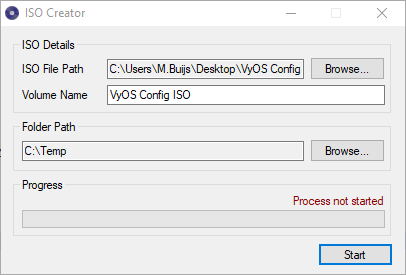
- Create an ISO file with your latest configuration on it. I used the following opensource tooling as displayed below. Link to IsoCreator.
Procedure:
- Open your vSphere Infrastructure and navigate to the Virtual Machine. This would be in my case “LAB-FW01“.
- Assign the newly created ISO file to the Virtual Machine. You connect the ISO file to the CD-ROM drive.
- Power-on the Virtual Machine.
- Make sure you select in the GRUB bootloader the following mode to startup from: “VyOS 1.1.8 linux (USB console)”.
- When VyOS is booted, log in with the following default credentials:
- Username: vyos
- Password: vyos
- You are now logged in into the Linux Shell.
- Now it’s time to mount the connected CD-ROM media:
sudo mount /dev/cdrom /mnt
- To make sure my configuration is available. I list the directory content with the following command:
- ls -l /mnt
- Now it is time to copy my old configuration to the startup configuration location of VyOS. Use the following command to perform this action (keep in mind: My configuration is called “2018-06-05-vyos.config.boot”):
- cp /mnt/2018-06-05-vyos.config.boot /config/config.boot
- To verify the copy action, I run the following command to display my hostname that is listed in the configuration file:
- cat /config/config.boot | grep LAB-FW01
- Now it is time to reboot the VyOS appliance. At the next boot, the old configuration will be loaded and everything should be restored. The following commands are required for rebooting VyOS:
- reboot
- yes
- After the reboot is completed you should log in with your old credentials that belong to the restored configuration.
- To verify that the configuration is loaded correctly I run the following command to display all my interfaces and sub-interfaces:
- show interfaces
- From this point, everything should be working.
Tips:
I have listed all the VyOS configuration locations that are important to this article.
In case you messed up your VyOS configuration you can always restore the default out-of-the-box configuration with the procedure described above. You only need to change the copy action in step eight to the following: (cp /opt/
- Startup configuration: /config/config.boot
- Default configuration: /opt/vyatta/etc/config.boot.default
YouTube Recording:
Because there are a couple of steps involved I decided to record a video of me performing the procedure. Keep in mind: my VMware Remote Console is in dutch :).
Final word
About six months back I switched from pfSense to VyOS. The main reason was the BGP support and stability of the BGP routing process. I am happy I did. The VyOS appliance is just amazing and extremely reliable and robust.
If you are familiar with the Cisco CLI than you will be flying through the VyOS CLI in no-time.